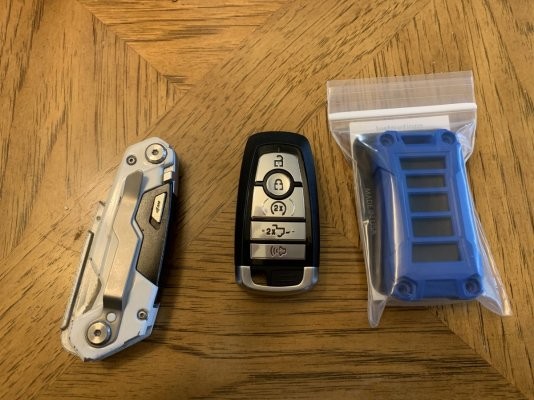
Hey Ford F-150 enthusiasts! Like many of you, I’m always looking for ways to personalize and improve my truck. Recently, I stumbled upon the AJT Designs Injection Molded key fob cover and decided to give it a shot. I wanted to share my experience, provide a review, and create a simple guide for anyone looking to upgrade their Ford F-150 key fob cover.
One thing I was hesitant about was potentially damaging my original Ford Raptor key fob. Since the installation process involves taking apart your existing fob, I opted to purchase a brand new, aftermarket replacement key fob from Amazon. This way, I could keep my original fobs intact. I even made a quick video (which you can find linked in the description of my original post) showing how to program a new Ford key fob, assuming you have two existing programmed keys.
Once I had the new, programmed fob ready to go, I started the process of disassembling it and fitting it into the AJT Designs case. AJT Designs has a helpful video tutorial on YouTube that guides you through the process, but I did encounter a few minor differences during my installation that I’ll highlight here.
So, let’s dive into the step-by-step guide on how to install the AJT Designs Ford F-150 key fob cover!
Disassembling Your Ford Key Fob
The first step is to carefully take apart your existing Ford key fob. Whether you’re using your original fob or a replacement, the disassembly process is the same.
-
Remove the Battery Cover: Begin by popping off the back cover of the key fob to access and remove the battery. This is a standard procedure for most key fobs and usually requires a small fingernail slot to pry it open.
-
Separate the Fob Halves: This is where things get a little tricky. The original key fob is held together by glue. You’ll need a sharp utility blade – I used a DeWalt carbide blade for precision – to carefully cut through the adhesive along the seam of the fob. Go around the seam repeatedly, applying gentle pressure. In the corners, you might need to press the blade in slightly further to help separate the halves.
Caution: Be extremely careful not to push the blade in too deep, as you could damage the circuit board inside. Patience is key here!
- Open the Fob: With enough careful cutting, the fob should eventually split apart, or at least enough to pry it open with your fingers. Be mindful as you separate the halves to avoid the circuit board popping out unexpectedly. Learn from my experience – try not to send the circuit board flying!
Assembling the AJT Designs Key Fob Cover
Now that you have the circuit board removed from the original fob, you’re ready to assemble it into the new AJT Designs key fob cover.
-
Position the Buttons: Start by placing the new buttons into their designated slots in the front half of the AJT Designs case. The kit is designed to be fairly universal, so it’s quite intuitive, and difficult to get wrong. My kit came with red panic buttons, which add a nice touch of customization.
-
Test Circuit Board Fit: Before proceeding further, lay the circuit board onto the back half of the AJT case to ensure it fits correctly. This pre-check can save you headaches later on.
- Install the Rubber Gasket: Take the large black rubber sealing gasket included in the AJT Designs kit. Place it over the back of the buttons you just installed in the front cover. Press it down firmly to ensure it’s flush and creates a good seal. This gasket is important for protecting the electronics from dust and moisture.
(Continued in the next response due to length constraints)
