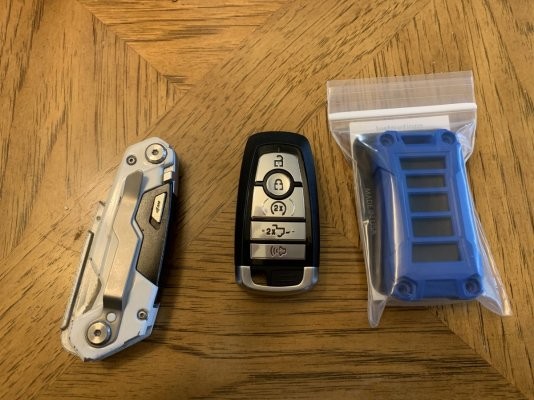
Is your Ford key fob looking a little worse for wear? Scratched, cracked, or just plain boring? As a car repair expert at keyfobx.com, I’ve seen my fair share of tired-looking key fobs. That’s why I was excited to try out the AJT Designs Injection Molded Ford Key Fob Case. I stumbled upon this online and decided to give it a shot, and I’m here to share my review and a little how-to guide for anyone looking to refresh their ford key fob case.
First things first, I didn’t want to risk damaging my original Ford Raptor key. Since you need to essentially dismantle your existing fob to transfer the electronics into the new case, I opted to purchase a blank replacement ford key fob case online. I picked one up from Amazon to be safe. If you’re doing this yourself, especially if you only have one programmed key, I’d highly recommend getting a replacement to avoid any issues with your primary keys during this process. Programming a new Ford key fob is pretty straightforward if you already have two programmed keys, and there are plenty of online tutorials available if you need guidance on that step.
Once my new replacement fob was programmed and confirmed working perfectly with my Ford Raptor, I was ready to dive into taking it apart and installing it into the AJT Designs ford key fob case. AJT Designs has a helpful video on YouTube demonstrating the process, which I recommend checking out. However, I did encounter a few minor differences between their video and my actual experience, so I’ll highlight those as we go.
Let’s get this ford key fob case upgrade started!
The first step is to carefully separate your old ford key fob case. Begin by popping off the back cover and removing the battery. Next, using a sharp utility blade – I used a Dewalt carbide blade for precision – you’ll want to carefully score along the seam where the two halves of the fob case meet. Go around the entire perimeter repeatedly, gently cutting through the adhesive that holds the two sides together. In the corners, I applied a bit more pressure with the blade to help initiate separation of the halves. Be cautious not to push the blade in too deeply, as the circuit board is located just beneath the surface.
With patience and careful work, the ford key fob case will eventually begin to split, or at least open enough to allow you to pry it apart. Try to avoid sending the circuit board flying across the room like I almost did when it finally separated!
Now, with your original ford key fob case disassembled, you’re ready to start assembling the new AJT Designs case. Begin by placing the button pads into their designated positions in the front half of the new case. The kit is designed to be quite universal for various Ford models, so it’s pretty intuitive and hard to get wrong. I chose the kit with the red panic button for a bit of customization. I also recommend laying the circuit board onto the back half of the new case at this stage to get a feel for how it will fit.
Next, take the large black rubber sealing gasket included in the AJT Designs ford key fob case kit. Position it over the back of the buttons you just installed in the front case half, and press it firmly into place until it sits flush. This gasket is important for protecting the electronics and giving the buttons a good feel.
Continued….
