Is your car key fob starting to fail? Do you have to press the buttons multiple times for your car to respond? Worn-out buttons are a common issue with key fobs, but before you rush to buy a new and expensive replacement, you might be able to fix it yourself. This guide, brought to you by the auto repair experts at keyfobx.com, will walk you through a simple DIY repair to restore your key fob’s functionality.
Over time, the internal carbon contacts on your key fob buttons can degrade. This wear and tear reduces their conductivity, making it harder for the button press to register with your car. Cleaning the circuit board and button contacts might offer a temporary fix, but often, the problem returns. If you’re experiencing this frustrating issue where your key fob requires multiple presses to lock or unlock your doors, this repair method could be the solution you need.
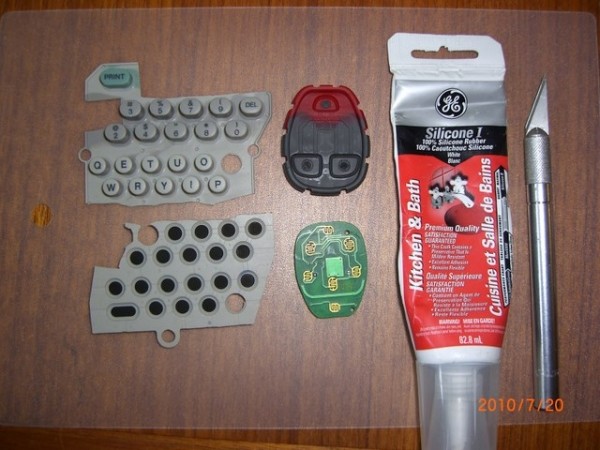
Materials You’ll Need
Before you begin, gather these materials:
- Your faulty key fob
- A sharp razor blade or Exacto knife
- 100% Silicone sealant (GE Silicone 1 or similar is recommended)
- Toothpick for precise silicone application
- A donor silicone keypad from an old remote (TV remote, electronic device remote, etc.)
Step-by-Step Guide to Repairing Your Key Fob
Let’s get started with the repair process. Follow these steps carefully to revitalize your key fob.
Step 1: Disassemble the Key Fob
Carefully take apart your key fob. Lay out all the components, including the circuit board, battery, and casing, along with your tools and materials, on a clean workspace.
Step 2: Prepare the Replacement Button
From your salvaged silicone keypad, select a button that is similar in size to the worn buttons on your key fob. Use your razor blade or Exacto knife to carefully cut out this button.
Step 3: Trim the Replacement Button
Now, you need to prepare the replacement button by trimming off the original carbon contact. Cut thinly from the back of the salvaged button, leaving a very thin layer of the gray/white silicone backing to support the new “carbon” contact you will create. This thin silicone layer is crucial for adhesion and button feel.
Step 4: Remove Worn Buttons and Prepare the Key Fob
This step requires precision. Carefully remove the worn-out “carbon” buttons from your key fob. From the back side of the rubber keypad, gently push on the button to make it protrude slightly. Use your razor blade to carefully cut and remove the old button.
Once the old button is removed, slightly deepen the indentation where the button was located. This creates a bit more space for the new, slightly thicker replacement button to sit properly. Trim your new replacement buttons to fit snugly within these indentations.
Step 5: Attach the New Button with Silicone
Using your toothpick, apply a very small drop of silicone sealant into the prepared indentation on the key fob keypad. Carefully place one of your trimmed replacement buttons into the silicone. Press it down gently and squarely. Immediately wipe away any excess silicone that squeezes out to prevent it from interfering with the button’s function or sticking to other parts. Crucially, avoid getting any silicone on the conductive surface of the new button that will contact the circuit board. If this happens, start with a fresh replacement button.
Repeat this process for each button you need to replace, allowing a couple of minutes of drying time between each button to avoid disturbing the previous one.
Step 6: Allow Sufficient Drying Time
Let the silicone dry and set completely. It’s recommended to allow at least two hours, but ideally, leave it overnight to ensure a strong bond.
Step 7: Reassemble and Test Your Key Fob
After the silicone has fully dried, clean the contacts on the circuit board using rubbing alcohol and a lint-free cloth to ensure optimal conductivity. Reassemble your key fob carefully. Go to your car and test the buttons.
If your key fob still isn’t working correctly, disassemble it again and inspect the contact side of the keypad and the circuit board for any silicone residue that might be interfering with the connection.
Conclusion
By following these steps, you can often repair your key fob and avoid the expense of a new remote and reprogramming. This DIY fix is a cost-effective and satisfying way to extend the life of your car key fob. Remember to handle the components with care, and with a little patience, you can restore your key fob to proper working order.
For more key fob solutions, tips, and replacement options, visit keyfobx.com – your trusted resource for all things key fobs.