Wallet. Cell phone. Car keys. For many of us, this is the essential trio we check for every time we head out the door. It’s incredibly frustrating when you reach your car, press the unlock button on your key fob, and absolutely nothing happens. No matter how many times you press, or how hard you press, the car doors remain stubbornly locked.
Before you panic, know that this situation is a common and easily solvable problem. In most cases, a non-responsive key fob simply means the battery is dead and needs replacing. The good news is, you don’t need a trip to the dealership or a costly service appointment. Changing your key fob battery is a surprisingly simple task you can handle yourself in just a few minutes!
Let’s walk you through the process of replacing your car key fob battery, ensuring you’re back on the road quickly and without unnecessary expense.
Identifying a Dead Key Fob Battery
Before diving into battery replacement, it’s helpful to confirm that a dead battery is indeed the issue. Here are some common signs your key fob battery is nearing the end of its life:
- Reduced Range: You need to be much closer to your car than usual for the fob to work.
- Intermittent Operation: The fob works sometimes but not others, especially when the weather is cold.
- Weak Signal Light: The small LED light on your key fob is dim or doesn’t light up at all when you press a button.
- No Response: The most obvious sign – pressing buttons yields absolutely no response from your car (no door unlocking, no panic alarm, etc.).
If you’re experiencing any of these symptoms, especially the latter, changing the battery is the first and easiest step to try.
Tools You’ll Need
The beauty of this DIY task is that it requires minimal tools. Here’s what you’ll typically need:
- Small Flathead Screwdriver or Pry Tool: Often, a small eyeglass screwdriver or even a butter knife will work. Some key fobs might have a designated slot for a key or tool.
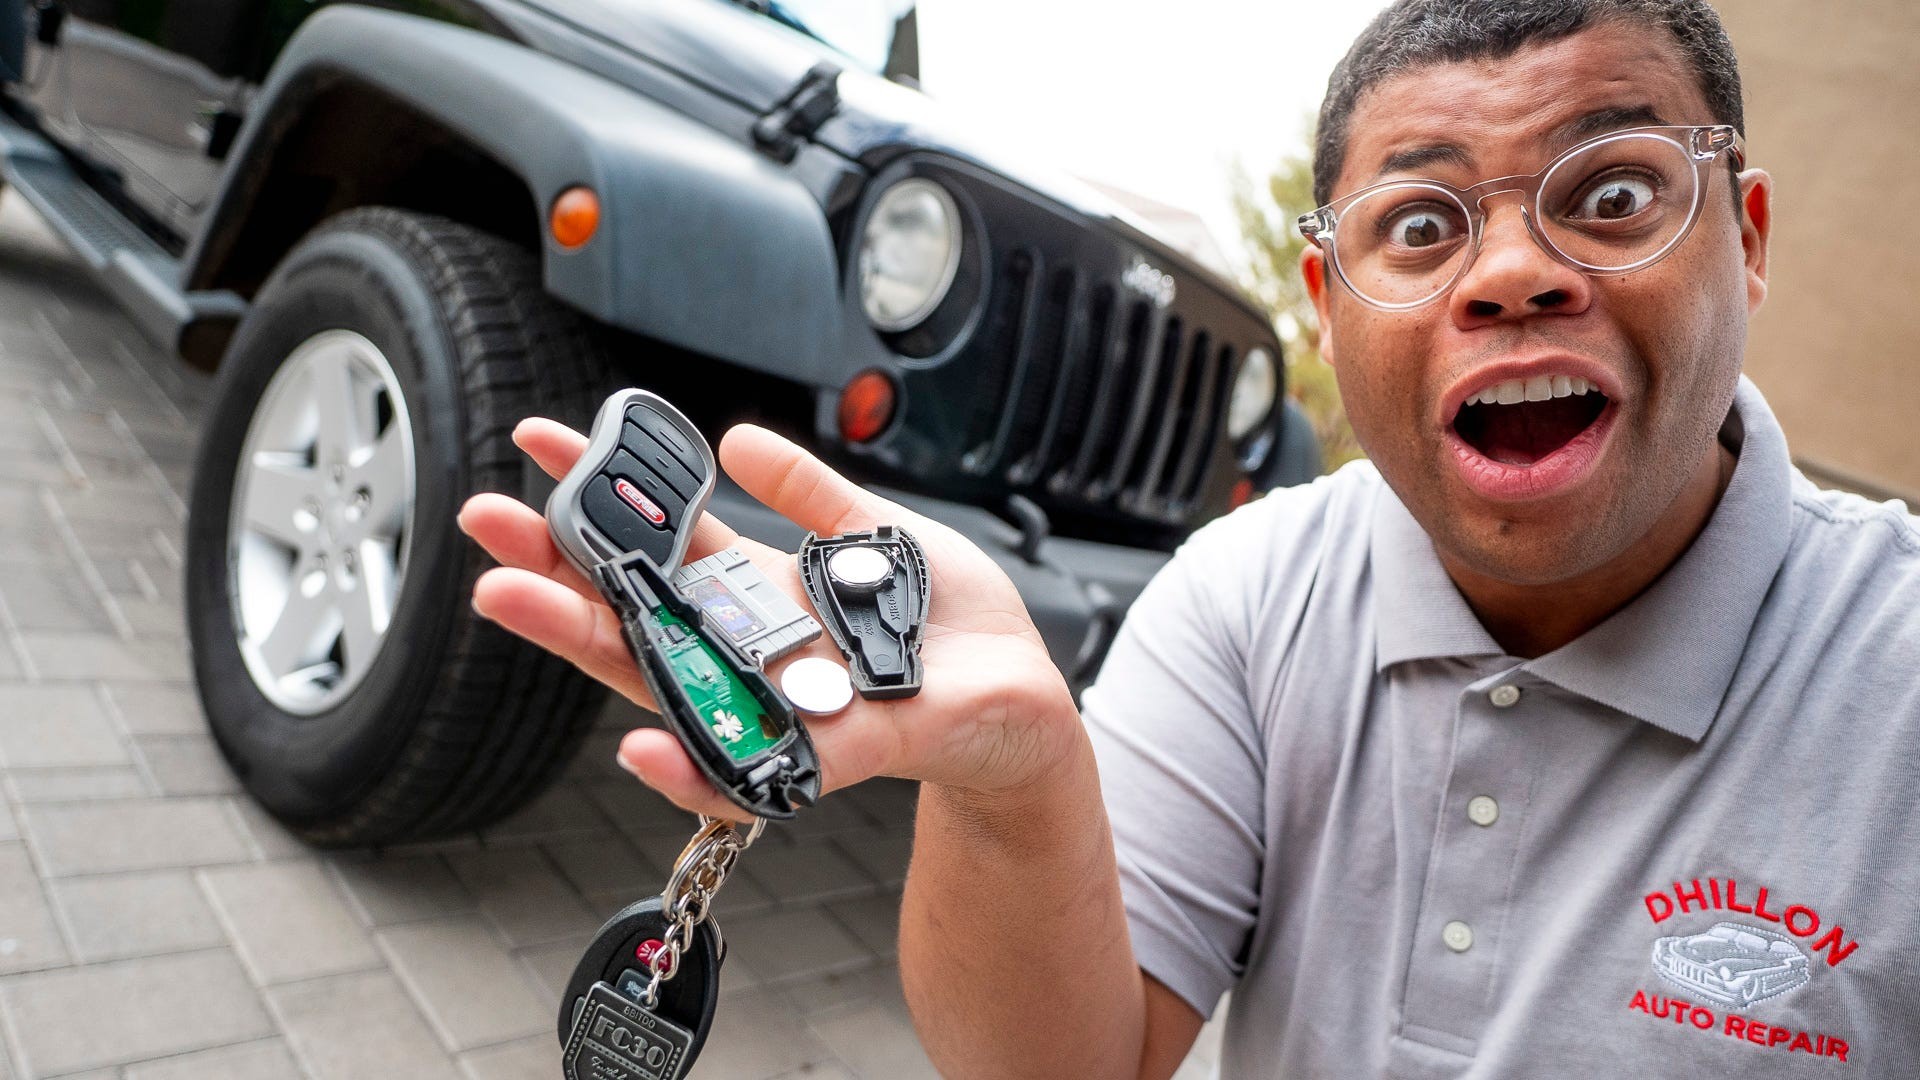
- New Battery: Key fobs commonly use coin cell batteries. The most frequent types are CR2032, CR2025, or CR1620. Check your owner’s manual or open your key fob (as described below) to identify the exact battery type needed. You can purchase these batteries at most drugstores, supermarkets, and online retailers.
- Soft Cloth or Paper Towel (Optional): This is to protect the key fob casing from scratches during the opening process.
 Hands using a screwdriver to open a key fob to change the battery
Step-by-Step Guide to Changing Your Key Fob Battery
Now, let’s get to the step-by-step process of changing your key fob battery. While specific key fob designs vary, the general procedure remains very similar across most makes and models.
Step 1: Locate the Notch and Prepare to Open the Fob
Examine your key fob closely. You’re looking for a small notch or seam on the fob casing. This is usually located along the edge of the fob. Some fobs require you to first remove a physical key blade (if your fob has one) to reveal the notch. Refer to your owner’s manual if you’re unsure about your specific key fob model.
Step 2: Open the Key Fob Casing
Using your flathead screwdriver or pry tool, gently insert the tip into the notch. Apply a small amount of pressure to carefully pry the two halves of the key fob casing apart. Work your way around the seam if needed, gently twisting or leveraging the tool to separate the casing. Avoid using excessive force, as you don’t want to damage the plastic housing. If you’re having difficulty, double-check for any screws or hidden latches on your fob model.
Step 3: Remove and Replace the Old Battery
Once the fob is open, you’ll see the battery. Take note of the battery’s orientation – specifically, which side is facing up (+ or -). This is crucial for installing the new battery correctly. Carefully remove the old battery. You might be able to gently pry it out with your fingertip or the edge of your tool.
Now, take your new battery and install it in the same orientation as the old one. Ensure it’s securely placed in the battery compartment.
Step 4: Reassemble the Key Fob
Carefully align the two halves of the key fob casing and press them firmly back together. You should hear or feel a click as the casing snaps back into place. Ensure there are no gaps and that the fob feels securely closed.
Step 5: Test Your Key Fob
Finally, test your key fob to see if it’s working. Press the unlock button and check if your car responds. If it does, congratulations! You’ve successfully replaced your key fob battery. If it doesn’t work immediately, double-check that the battery is installed correctly and that you’ve used the correct battery type. In rare cases, there might be another issue, but battery replacement resolves the problem in the vast majority of cases.
Battery Disposal and Key Fob Maintenance
Remember to dispose of the old battery properly. Coin cell batteries often contain materials that are harmful to the environment, so avoid throwing them in the regular trash. Many communities have battery recycling programs, or you can often take them to battery recycling centers or retailers that sell batteries.
While you have your key fob open, it’s also a good time to give it a quick clean. Use a disinfecting wipe to clean the casing, removing any dirt or grime. This simple maintenance step can help keep your key fob in good working condition.
Changing your key fob battery is a straightforward DIY task that can save you time and money. By following these simple steps, you can quickly restore your key fob’s functionality and avoid the inconvenience of a dead battery.