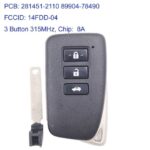
Is your Mini Cooper flashing a low key fob battery warning? For owners of Minis without the comfort access package, you might be facing a sealed key fob, seemingly designed to prevent battery replacement. BMW/Mini dealerships often suggest replacing the entire key fob, a costly solution. But don’t worry, replacing the battery yourself is entirely possible and can save you a significant amount of money. This guide provides a detailed, step-by-step process for a successful Mini Key Fob Battery Replacement at home.
Understanding your Mini key fob is the first step. Unlike comfort access key fobs with easily replaceable batteries, the standard Mini key fob is sealed and utilizes inductive charging. This means it charges wirelessly when placed in the designated slot on your dashboard. However, like all rechargeable batteries, the one in your key fob will eventually degrade and need replacing. While designed to be sealed, it’s not impossible to open it carefully and perform a mini key fob battery replacement.
Before we dive into the process of mini key fob battery replacement, let’s gather the necessary tools and materials. You will need:
- A very sharp knife or precision blade (like an X-Acto knife)
- Small flathead screwdriver or plastic pry tool
- Soldering iron and solder
- Replacement battery: Panasonic VL2020-1HFN rechargeable battery (ensure correct clips)
- Plastic glue or epoxy
- Clamps
- Small files or a Dremel (optional, for refining the chrome ring)
- Multimeter (optional, but recommended for checking polarity)
- Electro cleaner (optional, for micro-switches)
Now, let’s get started with the mini key fob battery replacement process:
Step 1: Removing the Chrome Ring
The first step is to carefully remove the chrome ring that surrounds the key fob. This ring is often fragile. While online videos may show it being removed easily, proceed with caution. Gently pry around the edges of the ring with a small flathead screwdriver or plastic pry tool. Be extremely careful as excessive force can break the ring. Even with utmost care, as you can see, damage is possible.
Step 2: Opening the Key Fob Casing
This is the trickiest part of the mini key fob battery replacement. The key fob casing is glued shut and needs to be carefully cut open. Use a very sharp knife. Safety is paramount here – ensure you have a firm and stable grip. A vise with wood blocks and rags, as shown, can provide a safe and stable platform to work on, preventing injury. Carefully cut along the seam of the key fob, going around the entire circumference. You’ll need to apply firm, consistent pressure to cut through the adhesive.
Once you’ve cut deep enough around the entire seam, you should be able to gently pry the two halves of the key fob apart.
Step 3: Accessing the Circuit Board
With the casing open, the internal circuit board should be easily accessible. Carefully lift it out of the casing.
Step 4: Desoldering the Old Battery
Now, the old battery needs to be desoldered from the circuit board. Using a soldering iron, carefully heat the solder points connecting the battery clips to the board. Once the solder is molten, gently remove the battery.
Here’s a closer look at the original battery. It’s a Panasonic VL2020-1HFN rechargeable battery, commonly used in BMW and Mini key fobs.
Step 5: Identifying and Ordering the New Battery
Take note of the battery type – Panasonic VL2020-1HFN. When ordering a replacement, pay close attention to the battery clips. As you can see, the + and – clips on this battery are 180 degrees apart. Batteries with 90 or 120-degree clip angles are also available, so ensure you order the correct type for your mini key fob battery replacement. Online retailers specializing in batteries or electronic components are good sources for purchasing the replacement.
Step 6: Soldering the New Battery
Before soldering the new battery, it’s wise to check the polarity with a multimeter to avoid mistakes. Ensure the positive (+) and negative (-) terminals are correctly oriented. Place the new battery in the same position as the old one and solder it securely to the circuit board. A common mistake is soldering the battery on the wrong side of the circuit board, as shown in the original attempt.
Avoid this error! Double-check the orientation before soldering.
Ensure the battery sits at the correct height above the circuit board for proper fitment back into the key fob casing. Re-solder if necessary to achieve the correct positioning.
Step 7: Reassembling the Key Fob
Carefully place the circuit board back into one half of the key fob casing. Before gluing the halves together, test the mechanical key mechanism. Ensure it locks and unlocks smoothly. Apply plastic glue or epoxy to the edges of the casing and carefully align and press the two halves together. Use clamps to hold the casing firmly together for at least 24 hours to allow the glue to dry and harden completely.
Step 8: Refitting the Chrome Ring
Refitting the chrome ring can be fiddly, especially if it was slightly damaged during removal. You might need to use small files or a Dremel to carefully reshape the plastic edges of the key fob casing to ensure a snug fit for the chrome ring. This step requires patience and delicate work to achieve a neat finish.
Step 9: Final Testing
Once everything is reassembled, test your mini key fob battery replacement. Check if the car responds to the key fob commands (locking, unlocking, etc.) and verify that the low battery warning on your Mini’s dashboard has disappeared.
Congratulations! You’ve successfully completed a mini key fob battery replacement and saved yourself the cost of a new key fob. While it requires some careful work and basic soldering skills, this DIY approach is a rewarding and economical solution for extending the life of your Mini key fob. Remember to take your time, be patient, and double-check each step for a successful outcome.