Is your Honda key fob displaying a low battery warning on your dashboard? Don’t worry, replacing the battery in your Honda key fob is a straightforward task you can easily do yourself. This guide will walk you through each step of changing your Honda key fob battery, saving you time and money.
You might have seen the low battery indicator on your Honda’s dashboard, just like in the image below. It’s a common sign that your key fob battery is nearing the end of its life. While it might still work for a short period, it’s best to replace it proactively to avoid being locked out of your car at an inconvenient time.
Before you head to a dealership or auto repair shop, consider that changing the key fob battery is a simple DIY task. Honda owner’s manuals provide basic instructions, but they can sometimes be a bit vague. We’re here to offer a more detailed, user-friendly guide with helpful tips to ensure a smooth and successful battery replacement.
You’ll only need a couple of readily available items for this task: a new CR2032 battery and a small screwdriver. CR2032 batteries are standard and can be purchased in most drugstores, supermarkets, or online. Buying a multi-pack can be a cost-effective option, allowing you to have spare batteries for future replacements or for your second key fob.
Let’s get started with the step-by-step process of changing your Honda key fob battery.
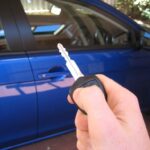
Step 1: Remove the Emergency Key
The first step is to remove the emergency key from your Honda key fob. Locate the small switch on the fob – it’s usually a small button or slider. Slide or press this switch to release the emergency key. This key is a physical backup to unlock your car door if your car battery is dead, but in this case, we need it to access the inside of the key fob.
Step 2: Open the Key Fob Casing
Once the emergency key is removed, you need to open the key fob casing to access the battery. Honda’s manual suggests using a coin to split the fob halves, recommending wrapping the coin in cloth to prevent scratches. However, a smarter and perhaps intended method is to use the emergency key itself.
Locate the small tabs on the side of the key fob where the emergency key was housed. Insert the tip of the emergency key into the slot between these tabs. Gently twist or pry the key. The key is designed to fit perfectly, and with a little pressure, the fob should split open into two halves. If you prefer, you can still use a coin wrapped in cloth, but the emergency key method is often more convenient and just as effective.
Step 3: Access and Remove the Old Battery
With the key fob open, you’ll see the CR2032 battery. The battery is held in place by small tabs. The owner’s manual warns about “losing the buttons,” which refers to accidentally dislodging the circuit board while trying to remove the battery. The buttons are connected to the circuit board, so excessive force can pull the board and potentially the buttons out of place.
To prevent this, lay the key fob flat on a table while removing the battery. Use a small screwdriver to gently pry the battery out. As shown in the image below, insert the screwdriver at the point indicated by the green arrow, under the battery and gently lever upwards. The yellow arrows in the image highlight the tabs that secure the battery. By keeping the fob flat, you stabilize the circuit board and minimize the risk of disturbing the buttons.
Step 4: Install the New Battery
Now, take your new CR2032 battery and install it in the key fob. Position the new battery under the two tabs (yellow arrows in the previous image) first. Then, press down on the other side of the battery until it snaps into place under the smaller tabs. Ensure the battery is securely seated in the compartment.
Step 5: Reassemble the Key Fob
Finally, reassemble the key fob. Align the two halves of the fob casing and press them back together. You might find that snapping them completely shut requires a bit more pressure than expected. Ensure the halves are correctly aligned to avoid damaging the locking tabs.
A helpful tip for reassembly is to first squeeze the end of the fob opposite to where the emergency key inserts. Once that end is secure, squeeze the end where the emergency key goes. This method can make the two halves snap together more easily and with less force, reducing the chance of damaging the casing.
Once reassembled, test your key fob to ensure it’s working correctly. The low battery warning should disappear from your Honda’s dashboard.
Changing your Honda key fob battery is a quick and easy maintenance task that anyone can do. By following these simple steps, you can avoid unnecessary trips to the dealership and keep your key fob working reliably. Consider purchasing a silicone cover to protect your key fob from scratches and wear and tear, extending its life and maintaining its appearance.