Transform your mundane car key into a statement piece with a Custom Car Key Fob. This project details how to create a unique, durable key fob using CNC machining, combining the robustness of aluminum with the natural beauty of hardwood. While this guide showcases a cosmetic enhancement, the principles can be adapted for salvaging broken fobs or integrating remotes into basic keys. Let’s delve into the process of crafting a personalized custom car key fob that sets you apart.
While opting for heavier materials might slightly reduce the remote’s range, the core functionality remains uncompromised. This project is all about elevating the aesthetics of your everyday car key, giving it a personalized touch and a premium feel.
Our starting point is a standard 2010 CRV key – functional but lacking in visual appeal. The goal is to remedy this ordinariness with a bespoke design and superior materials.
Disassembling the original key fob reveals a well-engineered, two-part plastic shell, secured by a small screw and clip. The remote component is neatly self-contained, demonstrating thoughtful design for a compact unit.
Focusing on the essentials, we retain only the base of the remote unit, which houses the battery and circuit board. This bottom piece becomes the foundation around which our custom car key fob will be built.
The key itself is firmly glued within the original fob shell. Careful separation is required, breaking the plastic to free the key. To maintain project simplicity, we avoid modifying the key itself, ensuring seamless integration into the new custom housing.
With all components analyzed, meticulous measurements are crucial. Every dimension, nook, and cranny must be precisely recorded to guarantee correct positioning of buttons, indicator lights, and the key within the custom fob. While this example is based on a specific car key, the fundamental process of measurement and adaptation can be applied to various car makes and models for creating your own custom car key fob.
The design phase involves creating digital models of the new components. Moving away from the soft, oval shape of the original fob, a more angular and modern aesthetic is chosen. The design comprises an aluminum frame and buttons, paired with hardwood shells. Machine screws will secure the bottom shell and key to the aluminum frame, ensuring a robust and movement-free assembly. Precise measurements, cross-referenced with the original remote and key, are paramount to avoid errors. This meticulous design phase is essential for a successful custom car key fob.
Machining begins with the aluminum parts using a 1/16″ upcut bit on a Lead CNC 1010 machine. Aluminum is selected for its durability, making it an ideal material for a key fob that will endure daily wear and tear.
The fine detail achievable with a small bit necessitates a longer machining time – approximately 4 hours for the aluminum components. Small holes integrated into the frame design enhance epoxy adhesion in later assembly stages.
Post-machining, the aluminum parts are carefully separated from the stock material. A quick cleanup with files and sandpaper refines the edges and surfaces, revealing the sleek aluminum frame and buttons. Next, attention turns to the wooden shells.
Chechen wood, a beautiful and durable hardwood, is chosen for the fob shells. Utilizing the same Lead CNC machine, the wood components are milled. Wood machining is significantly faster, taking only around 20 minutes to produce the shells.
Following wood milling and a brief cleanup, all custom car key fob parts are nearing completion. Only minor refinements are needed before assembly can commence.
Screw holes in the wood shells are recessed using a drill press. This countersinking ensures the screw heads sit flush with the surface of the wood, providing a cleaner finish and comfortable handling.
A small chamfer is added to the outer edges of the wood shells. This angled edge softens the corners, enhancing both the aesthetic appeal and ergonomic feel of the custom car key fob.
The key’s existing hole needs enlargement to accommodate the M3 machine screw, which will pass through the key and thread into the aluminum frame. This ensures secure mechanical fastening of the key within the fob.
The aluminum frame is then tapped to create threads for the machine screw. With threading complete, the aluminum frame is cleaned and epoxied to the top face of the car key. Epoxy is chosen for its strong adhesive properties in this thin section application. While long-term durability of epoxy in this application is being evaluated, initial results are promising.
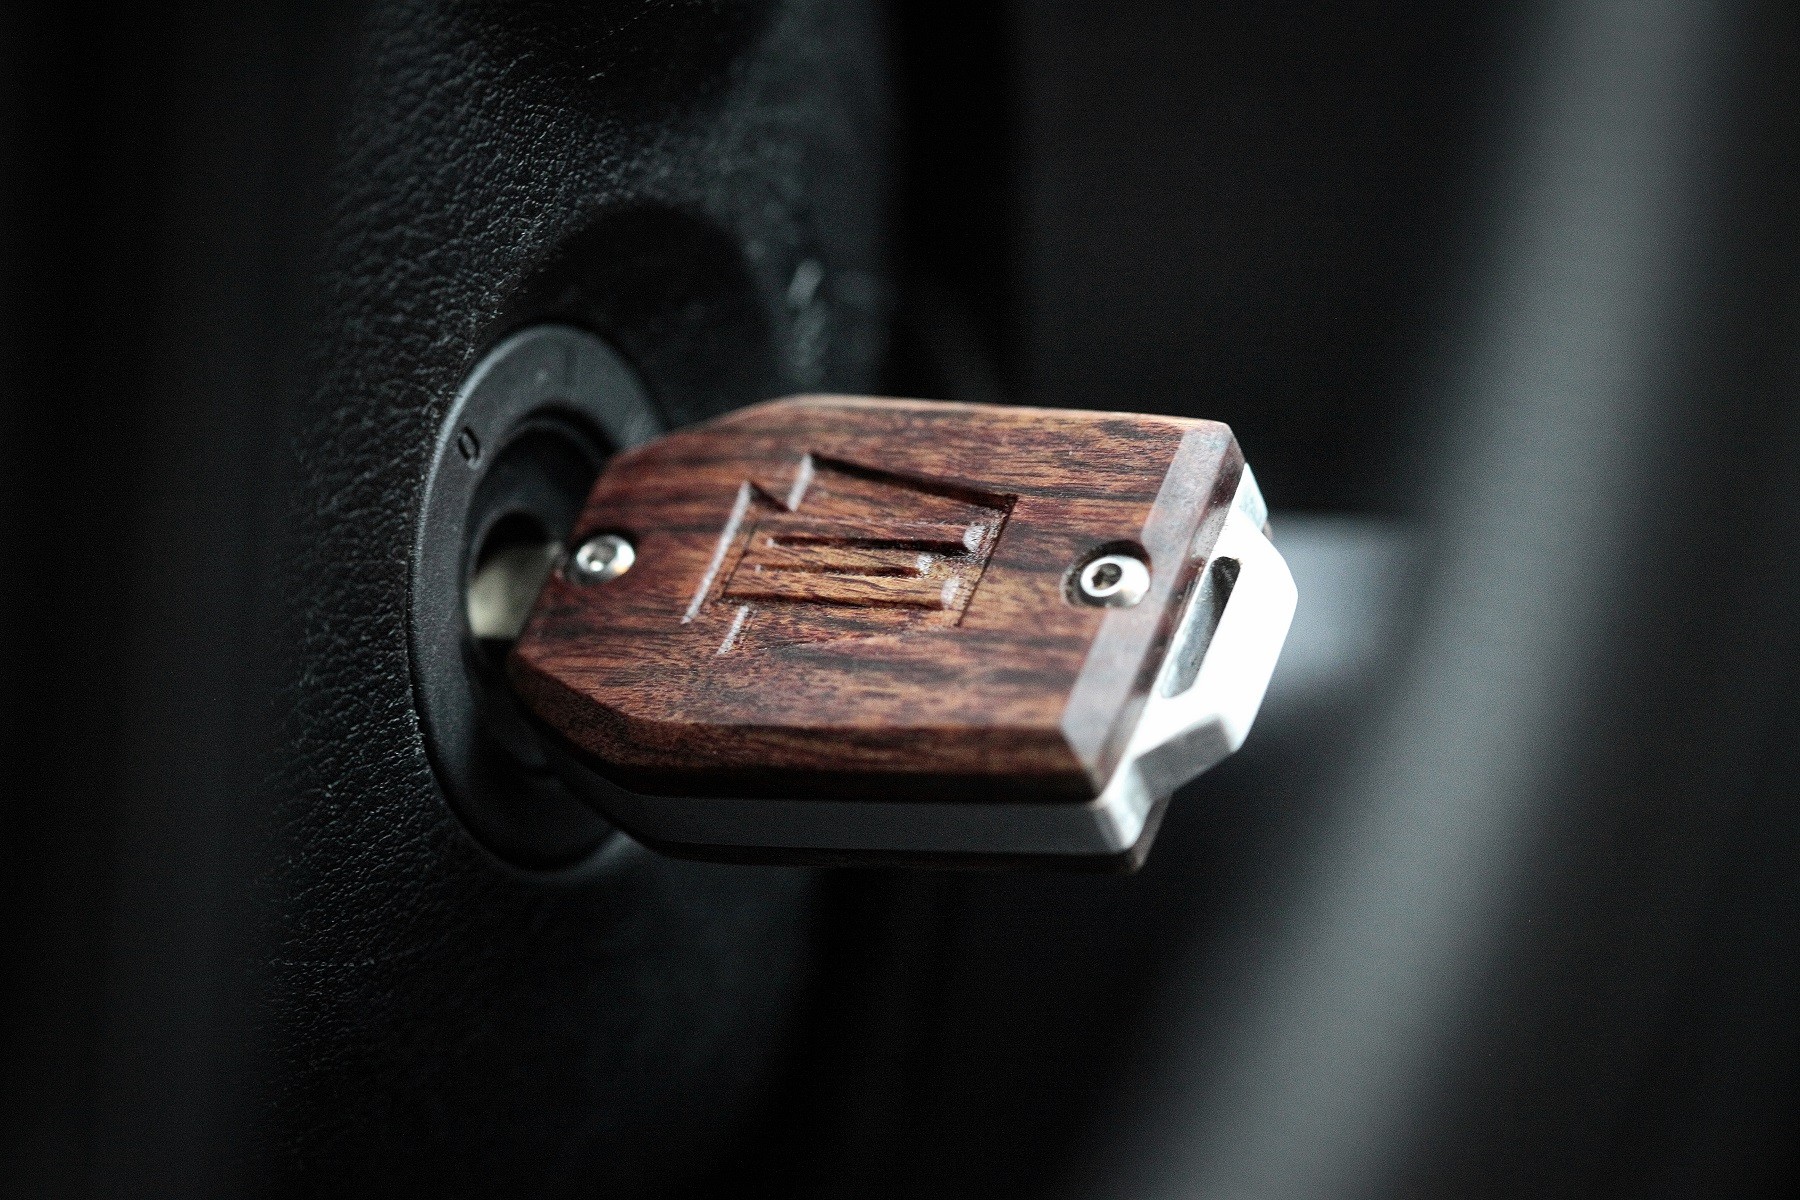
As a final personal touch, a logo is engraved onto the back of the wood shell using a 90° V-bit. This adds a unique branding element to the custom car key fob.
All components – aluminum frame and buttons, hardwood shells, and engraved detail – are ready for final assembly after being treated with oil to enhance the wood’s natural beauty. Assembly is straightforward: buttons and the circuit board are placed into the frame, and the two shells are closed and secured with machine screws.
The transformation is complete. From a mass-produced, generic car key to a personalized, one-of-a-kind custom car key fob, the result is a testament to the possibilities of DIY customization and CNC machining.
Thank you for exploring this custom car key fob project. This marks a foray into automotive-related DIY, with more ideas already in development. For further projects and creations, follow www.instagram.com/michicanery.