Tired of the mundane look of your standard car key fob? In a world of personalization, even your car keys deserve a touch of individuality. This guide dives into the exciting process of creating Custom Key Fobs, transforming your ordinary remote into a unique accessory that reflects your style. Whether you’re looking to revive a damaged fob or simply crave a more distinctive aesthetic, crafting a custom key fob opens up a realm of possibilities.
Disassembling the Original Key Fob
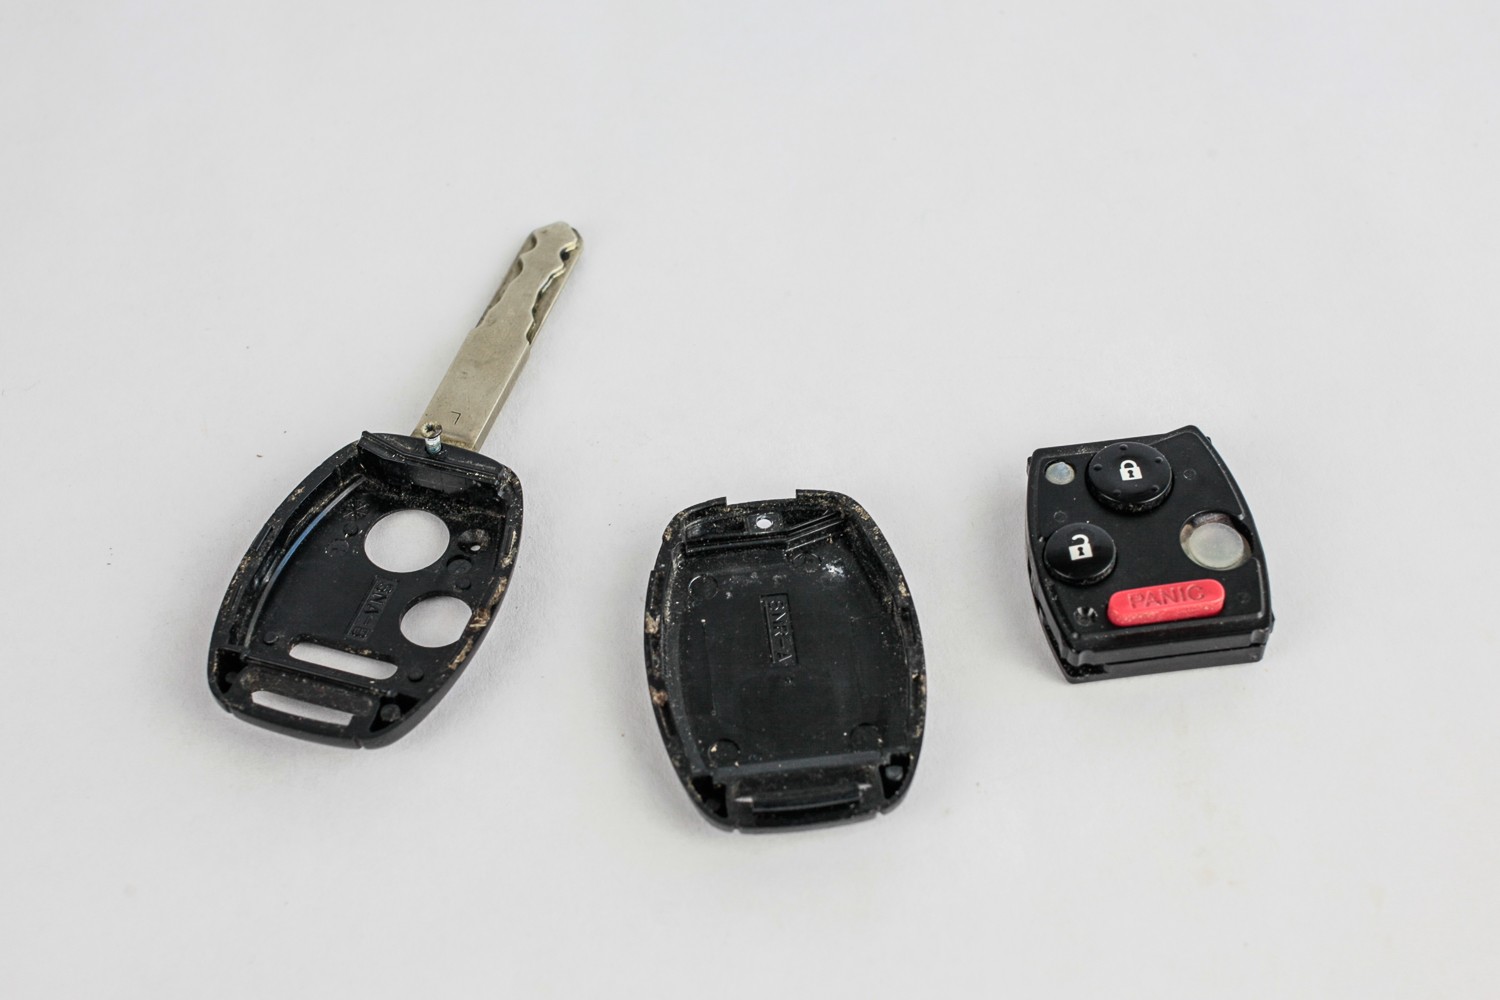
Let’s begin with the heart of our project: the original key fob. For this demonstration, we’re using a key from a 2010 Honda CRV – a perfectly functional but visually unremarkable key. The first step is to carefully disassemble the factory fob to access its internal components.
Typically, these fobs are held together by a small screw and plastic clips. Locate and remove the screw, which often threads into the base of the key itself. Once the screw is out, gently pry apart the plastic shell, taking care not to damage the internal circuitry. You’ll find that the remote electronics are usually contained within a compact, self-contained unit – a testament to efficient design. Inside this unit, you’ll see the circuit board and battery, the essential elements we’ll be preserving for our custom creation.
Component Analysis and Measurement
With the original fob disassembled, the next crucial step is to meticulously examine and measure each component. This stage is paramount to ensure that your custom key fob will function flawlessly and fit together perfectly.
Carefully measure the dimensions of the circuit board, battery compartment, button locations, and the key itself. Note the precise positions of buttons and indicator lights relative to fixed points on the circuit board. While this example is based on a Honda key, the general principle of component analysis and measurement is applicable across various car makes and models. Understanding the spatial relationships within the original fob is key to replicating its functionality in your custom design.
Designing the Custom Key Fob Parts
Now for the creative part – designing the components of your custom key fob. Utilizing software like Adobe Illustrator or similar CAD programs, you can bring your vision to life. The design process involves creating digital blueprints for the new fob’s frame and shells.
For this project, a combination of materials was chosen to achieve both durability and aesthetic appeal. An aluminum frame provides robust protection for the internal electronics and key, while hardwood shells offer a touch of natural elegance and personalized style. Moving away from the typical soft, oval shape of factory fobs, an angular design was chosen for a more modern and assertive look. The design incorporates precisely placed button openings and considers the mounting points for machine screws, which will securely fasten the fob’s components. Accurate measurements taken in the previous step are now translated into the digital design, ensuring a snug and functional fit for all internal parts.
CNC Milling the Aluminum Frame
With the digital design finalized, the fabrication process begins with CNC (Computer Numerical Control) milling. The aluminum frame, serving as the structural backbone of the custom key fob, is milled first.
A CNC machine like the Lead CNC 1010, equipped with a fine 1/16″ upcut bit, is ideal for this task. Milling aluminum, especially at a thickness of 1/4″, requires patience and precision. A slow feed rate and shallow depth of cut are crucial to achieve clean cuts and prevent bit breakage. While the milling process for the aluminum frame can be time-consuming (around 4 hours in this case), the fine bit allows for intricate details and sharp edges. Small holes incorporated into the frame design serve to enhance the adhesion of epoxy in later assembly stages.
CNC Milling the Hardwood Shells
Next, the hardwood shells are CNC milled. For this project, a beautiful piece of Chechen wood was selected, adding a warm and luxurious feel to the custom key fob.
Milling wood is a significantly faster process compared to aluminum. Using the same Lead CNC machine, the hardwood shells are quickly shaped in approximately 20 minutes. The CNC milling process ensures precise contours and consistent dimensions for both the aluminum frame and wood shells, guaranteeing a seamless fit in the final assembled fob.
Finishing and Assembly
Once all components are milled, the finishing and assembly stages bring the custom key fob to life. The milled parts require some cleanup, typically involving filing and sanding to remove any burrs or sharp edges.
Screw holes in the wood shells are recessed using a drill press to accommodate the screw heads, ensuring a flush surface. A chamfer is then applied to the outer edges of the shells, adding a refined detail. The hole in the key, originally threaded, is enlarged to allow the machine screw to pass through freely. The aluminum frame is then tapped to create threads that will receive the screws. In a slightly unconventional approach, epoxy is used to bond the aluminum frame to the top face of the key. While traditional key fobs might employ mechanical fasteners, epoxy offers a strong and clean bond in this application. (Feedback on the long-term durability of this epoxy method is welcome for those with more experience!)
Engraving and Final Touches
The final touches elevate the custom key fob from a functional object to a personalized statement. A logo or design can be engraved onto the back of the wood shell using a 90° V-bit on the CNC machine.
After engraving, the wood shells are typically treated with oil to enhance their natural beauty and provide protection. Assembly is then a straightforward process: the buttons and circuit board are placed into the frame, and the wood shells are closed and secured with the machine screws.
From a generic, mass-produced car accessory to a unique, handcrafted piece, the custom key fob is complete. While the heavier materials might slightly reduce the remote’s range, all original functionalities are preserved within a significantly upgraded aesthetic. This project demonstrates the potential for personalization in even the smallest details of our daily lives. Explore more custom creations and automotive projects by checking out www.instagram.com/michicanery.