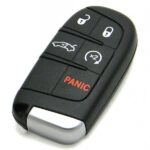
Is your car key fob acting up, triggering the alarm or popping the trunk with the slightest touch? Many car owners experience the frustration of an overly sensitive key fob. If you’re tired of accidentally setting off your car alarm or unlocking your doors when your key fob is just in your pocket, you’re not alone. Fortunately, this is a common issue with a relatively simple DIY fix, especially for certain Ford models. This guide will walk you through how to adjust your key fob to reduce its sensitivity and regain control.
Understanding the Overly Sensitive Key Fob Issue
An overly sensitive key fob can be a major annoyance. It often leads to unintended actions like:
- Accidental unlocking of doors or trunk
- Setting off the panic alarm unexpectedly
- Draining the car battery due to constant signal transmissions
This sensitivity usually stems from the small metal discs located behind the rubber buttons inside the key fob. Over time, these discs can become loose or misaligned, causing the buttons to activate with minimal pressure.
DIY Fix: Step-by-Step Guide to Repairing Your Key Fob
The good news is that you can often fix this issue yourself with a few simple steps. This guide is based on a common fix for Ford key fobs, particularly those with the FCC ID M3N5WY8609, often found in models like Ford Escape, Focus, and Explorer from the 2011-2018 range. However, the general principle may apply to other key fobs as well.
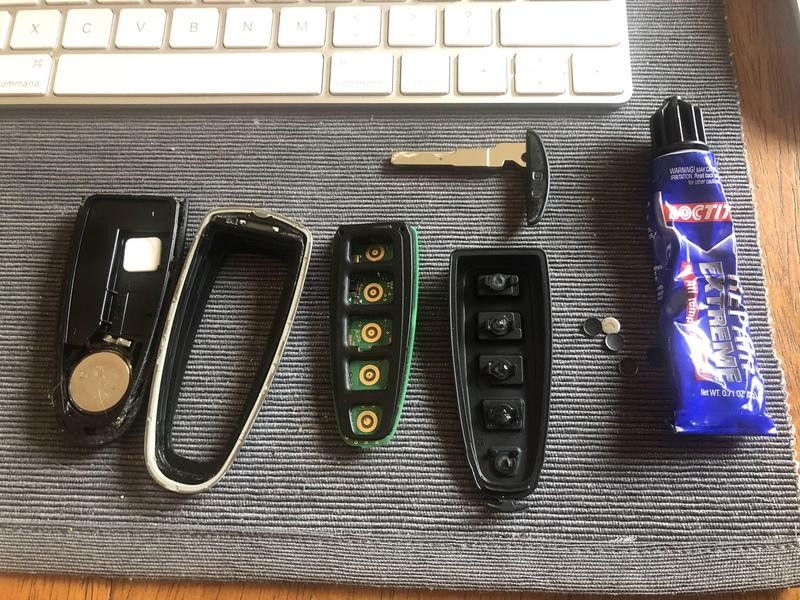
Step 1: Open the Key Fob Casing
First, you’ll need to carefully open your key fob.
- Remove the Valet Key: Locate the small switch or button that releases the valet key. Remove the valet key from the fob.
- Pry Open the Casing: Use a small flathead screwdriver or even the valet key itself to gently pry open the key fob casing. Insert the screwdriver into the seam and carefully twist to separate the two halves of the fob. Be gentle to avoid damaging the plastic.
Step 2: Access the Button Pad and Metal Discs
Once the casing is open, you’ll see the internal components of the key fob.
- Remove the Circuit Board (Carefully): In some key fobs, the rubber button pad might be directly accessible. In others, you may need to carefully lift out the circuit board to access the back of the button pad. Note how the components are positioned for reassembly.
- Locate the Rubber Button Pad: Identify the rubber piece that contains the buttons. It should lift out easily.
- Inspect Metal Discs: Turn the rubber button pad over to examine the back. You’ll see small metal discs adhered to the back of each button. These are the culprits behind the sensitivity issue. In many cases, some of these discs may be loose or missing from their original positions.
Step 3: Modify the Button Pad and Reattach Metal Discs
Now, you’ll modify the button pad to reduce sensitivity and reattach the metal discs.
- Remove Metal Discs (If Necessary): If the discs are still attached, carefully remove all of them from the rubber button pad.
- Clip the Center Nub: On the back of each button on the rubber pad, you’ll notice a small raised nub where the metal disc was attached. Use nail clippers to carefully clip off these nubs. This reduces the pressure needed to activate the button.
- Clean and Re-glue Discs: Clean off any old adhesive from both the metal discs and the button pad. Use a small amount of Loctite repair adhesive or similar to re-glue the metal discs back onto the center of each button. Optional Disabling Buttons: If you want to disable certain buttons (like panic or remote start), you can choose not to reattach the metal discs to those specific buttons.
- Allow Adhesive to Dry: Let the adhesive dry completely according to the product instructions before reassembling.
Step 4: Reassemble and Test
Once the adhesive is dry, carefully reassemble your key fob.
- Replace Battery (Optional): This is a good time to replace the key fob battery, especially if it’s been a while. The CR-2032 battery size is commonly used in these fobs.
- Reassemble Key Fob: Carefully place the rubber button pad back into the casing, followed by the circuit board if it was removed. Snap the two halves of the key fob casing back together until they are securely closed.
- Test the Key Fob: Test all the buttons to ensure they are working correctly and that the sensitivity issue is resolved. The buttons should now require a deliberate press to activate.
Additional Tips and Information
- Battery Replacement: Consider replacing the CR-2032 battery during this process for preventative maintenance.
- Ford Compatibility: This fix is reported to work for Ford Smart Keys with FCC ID M3N5WY8609 and OE part number 164-R8091, often found in models like Ford Escape, C-Max, Focus, Flex, Explorer, Expedition, and Taurus (2011-2018). Circuit boards may be marked Continental 1408-2 and 94V-0.
- Caution: Work in a clean, well-lit area. Be gentle when opening the key fob and handling internal components. If you are uncomfortable with DIY electronics repair, consult a professional locksmith or car dealership.
By following these steps, you can often resolve an overly sensitive key fob issue and restore proper function to your keyless entry remote. Enjoy a less frustrating experience with your car key fob!