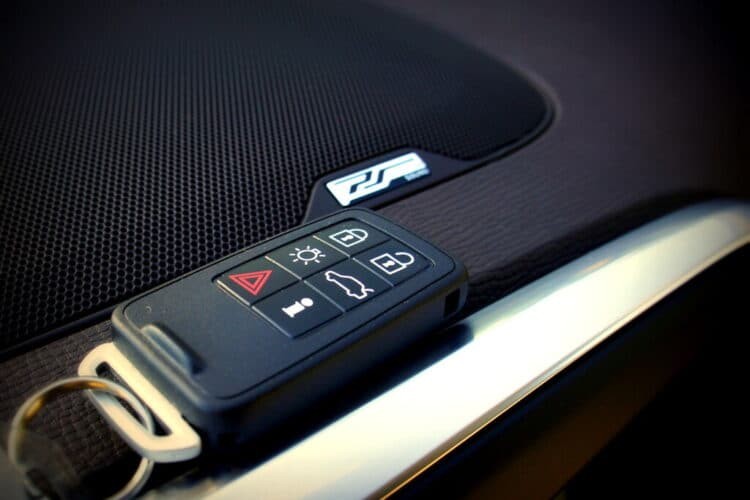
Car key fobs have become indispensable in modern vehicles, offering convenient remote access to various car functions, from locking and unlocking doors to activating alarms and even starting the engine remotely. These electronic marvels, while incredibly useful, can sometimes encounter issues. Whether your old key fob has stopped working, or you’ve acquired a new one, understanding how to connect a new key fob to your car is a valuable skill. This guide provides a detailed walkthrough of the process, ensuring you can confidently manage your car’s key fob connectivity.
It’s crucial to recognize that while a general procedure exists, the precise steps for connecting a new key fob can vary significantly depending on your car’s make, model, and year. Therefore, consulting your vehicle’s owner’s manual is always the first and most important step. This manual contains manufacturer-specific instructions that are tailored to your car’s unique system. If your physical manual is misplaced, most manufacturers offer digital versions on their websites, readily accessible with a quick online search.
Let’s delve into the general steps involved in connecting a new key fob to your car, providing a foundation before you consult your specific manual for any necessary variations.
Step-by-Step Guide to Connecting Your New Key Fob
While the exact method might differ, these steps represent a common approach to programming a new key fob. Always prioritize the instructions in your car’s owner’s manual for the most accurate guidance.
Step 1: Prepare for the Programming Process
Begin by positioning yourself in the driver’s seat of your car. Ensure all doors are completely closed, as this is often a prerequisite for the car’s system to enter programming mode. Have your new key fob readily accessible, along with your car’s ignition key. It’s also highly recommended to have your owner’s manual open to the key fob programming section, or have it readily available digitally, in case you need to refer to specific instructions quickly.
Step 2: Initiate the Ignition Cycle
Insert your car’s ignition key into the ignition slot. Turn the key to the “ON” position. This position is usually just before the point where you would engage the starter to turn on the engine. The goal here is to power up your car’s electrical system without actually starting the engine. Leave the key in this “ON” position for a few seconds, as indicated in your car’s manual or general programming guides.
Step 3: Engage the Key Fob’s Lock Button
Take your new key fob and aim it towards the designated receiver in your car. The receiver’s location can vary, but it’s often situated in the front of the car, near the rearview mirror, or on the steering column. Press and hold the “lock” button on the key fob for a couple of seconds. This action transmits a signal to your car’s receiver, initiating the programming sequence.
Step 4: Complete the Programming Sequence
Swiftly turn the ignition key back to the “OFF” position, effectively shutting off the car’s electrical system (without starting the engine). Remove the key from the ignition slot. This action signals to the car’s computer that you are completing the programming sequence. In some car models, you might hear a chime or see a light flash indicating that the system has acknowledged the programming attempt.
Step 5: Program Additional Key Fobs (If Necessary)
If you have multiple key fobs to program, it’s often necessary to program them all in a single session. Many car systems will erase previously programmed fobs when a new one is added for security reasons. Therefore, immediately repeat steps 2 through 4 for each additional key fob you need to connect. It’s crucial to perform these steps quickly and without significant pauses between programming each fob to ensure the system recognizes them all during the same programming cycle.
Step 6: Test the Newly Connected Key Fobs
After programming all desired key fobs, test each one individually to confirm successful connection. Press the “lock” or “unlock” button on each fob and listen for the car’s locks to engage or disengage. A successful connection is typically indicated by the audible click of the door locks and potentially the flashing of the car’s lights, depending on your vehicle’s feedback system. If all key fobs function as expected, the programming process is complete.
Troubleshooting and Important Considerations
If you encounter difficulties connecting your new key fob, consider these troubleshooting steps:
- Double-Check the Manual: Revisit your car’s owner’s manual to meticulously review the specific programming steps for your vehicle. Minor variations in the procedure can significantly impact the outcome.
- Battery Check: Ensure the battery in your new key fob is new and correctly installed. A weak or improperly installed battery can prevent the fob from transmitting a signal.
- Repeat the Process: Sometimes, the programming process might require a couple of attempts. Try repeating the entire sequence from Step 1 again, paying close attention to timing and each step.
- Seek Professional Assistance: If you’ve diligently followed the manual’s instructions and troubleshooting steps without success, it might be necessary to consult a professional. A certified car locksmith or your dealership’s service department has specialized equipment and expertise to diagnose and resolve key fob programming issues. They can also handle more complex programming scenarios that might require diagnostic tools.
Connecting a new key fob to your car is often a straightforward process that can be accomplished at home. By carefully following the steps outlined in your car’s owner’s manual and utilizing this general guide, you can regain the convenience and security of remote car access. Remember, when in doubt, professional assistance is always available to ensure your key fob is correctly and securely connected to your vehicle.