Key fobs are not only incredibly useful for keeping your keys organized and easily accessible, but they also make fantastic personalized gifts or craft sale items. If you’re looking for a quick, rewarding, and fun sewing project, learning How To Make A Key Fob is a perfect choice. Using just scrap fabric, batting, and a key ring, you can create stylish and practical key fobs in no time. Whether you’re a seasoned sewer or just starting out, this step-by-step tutorial will guide you through the process of creating your own charming key fobs. Let’s gather your supplies and dive into this easy sewing project!
Materials You’ll Need to Make a Key Fob
Before we begin, make sure you have these materials ready:
- Scrap fabric (two coordinating pieces recommended for a nice accent)
- Scrap batting
- Key ring
- Sewing machine
- Thread
- Scissors or rotary cutter
- Iron
- Clips or pins
- Needle for burying threads (optional, but recommended for a cleaner finish)
Now that you have everything prepared, let’s move on to the sewing instructions and learn how to make a key fob!
Sewing Instructions: Step-by-Step Guide to Create Your Key Fob
Follow these detailed sewing instructions to create your own key fob from scratch. Each step is designed to be easy to follow, even for beginner sewers.
1. Sew Fabric Pieces Together
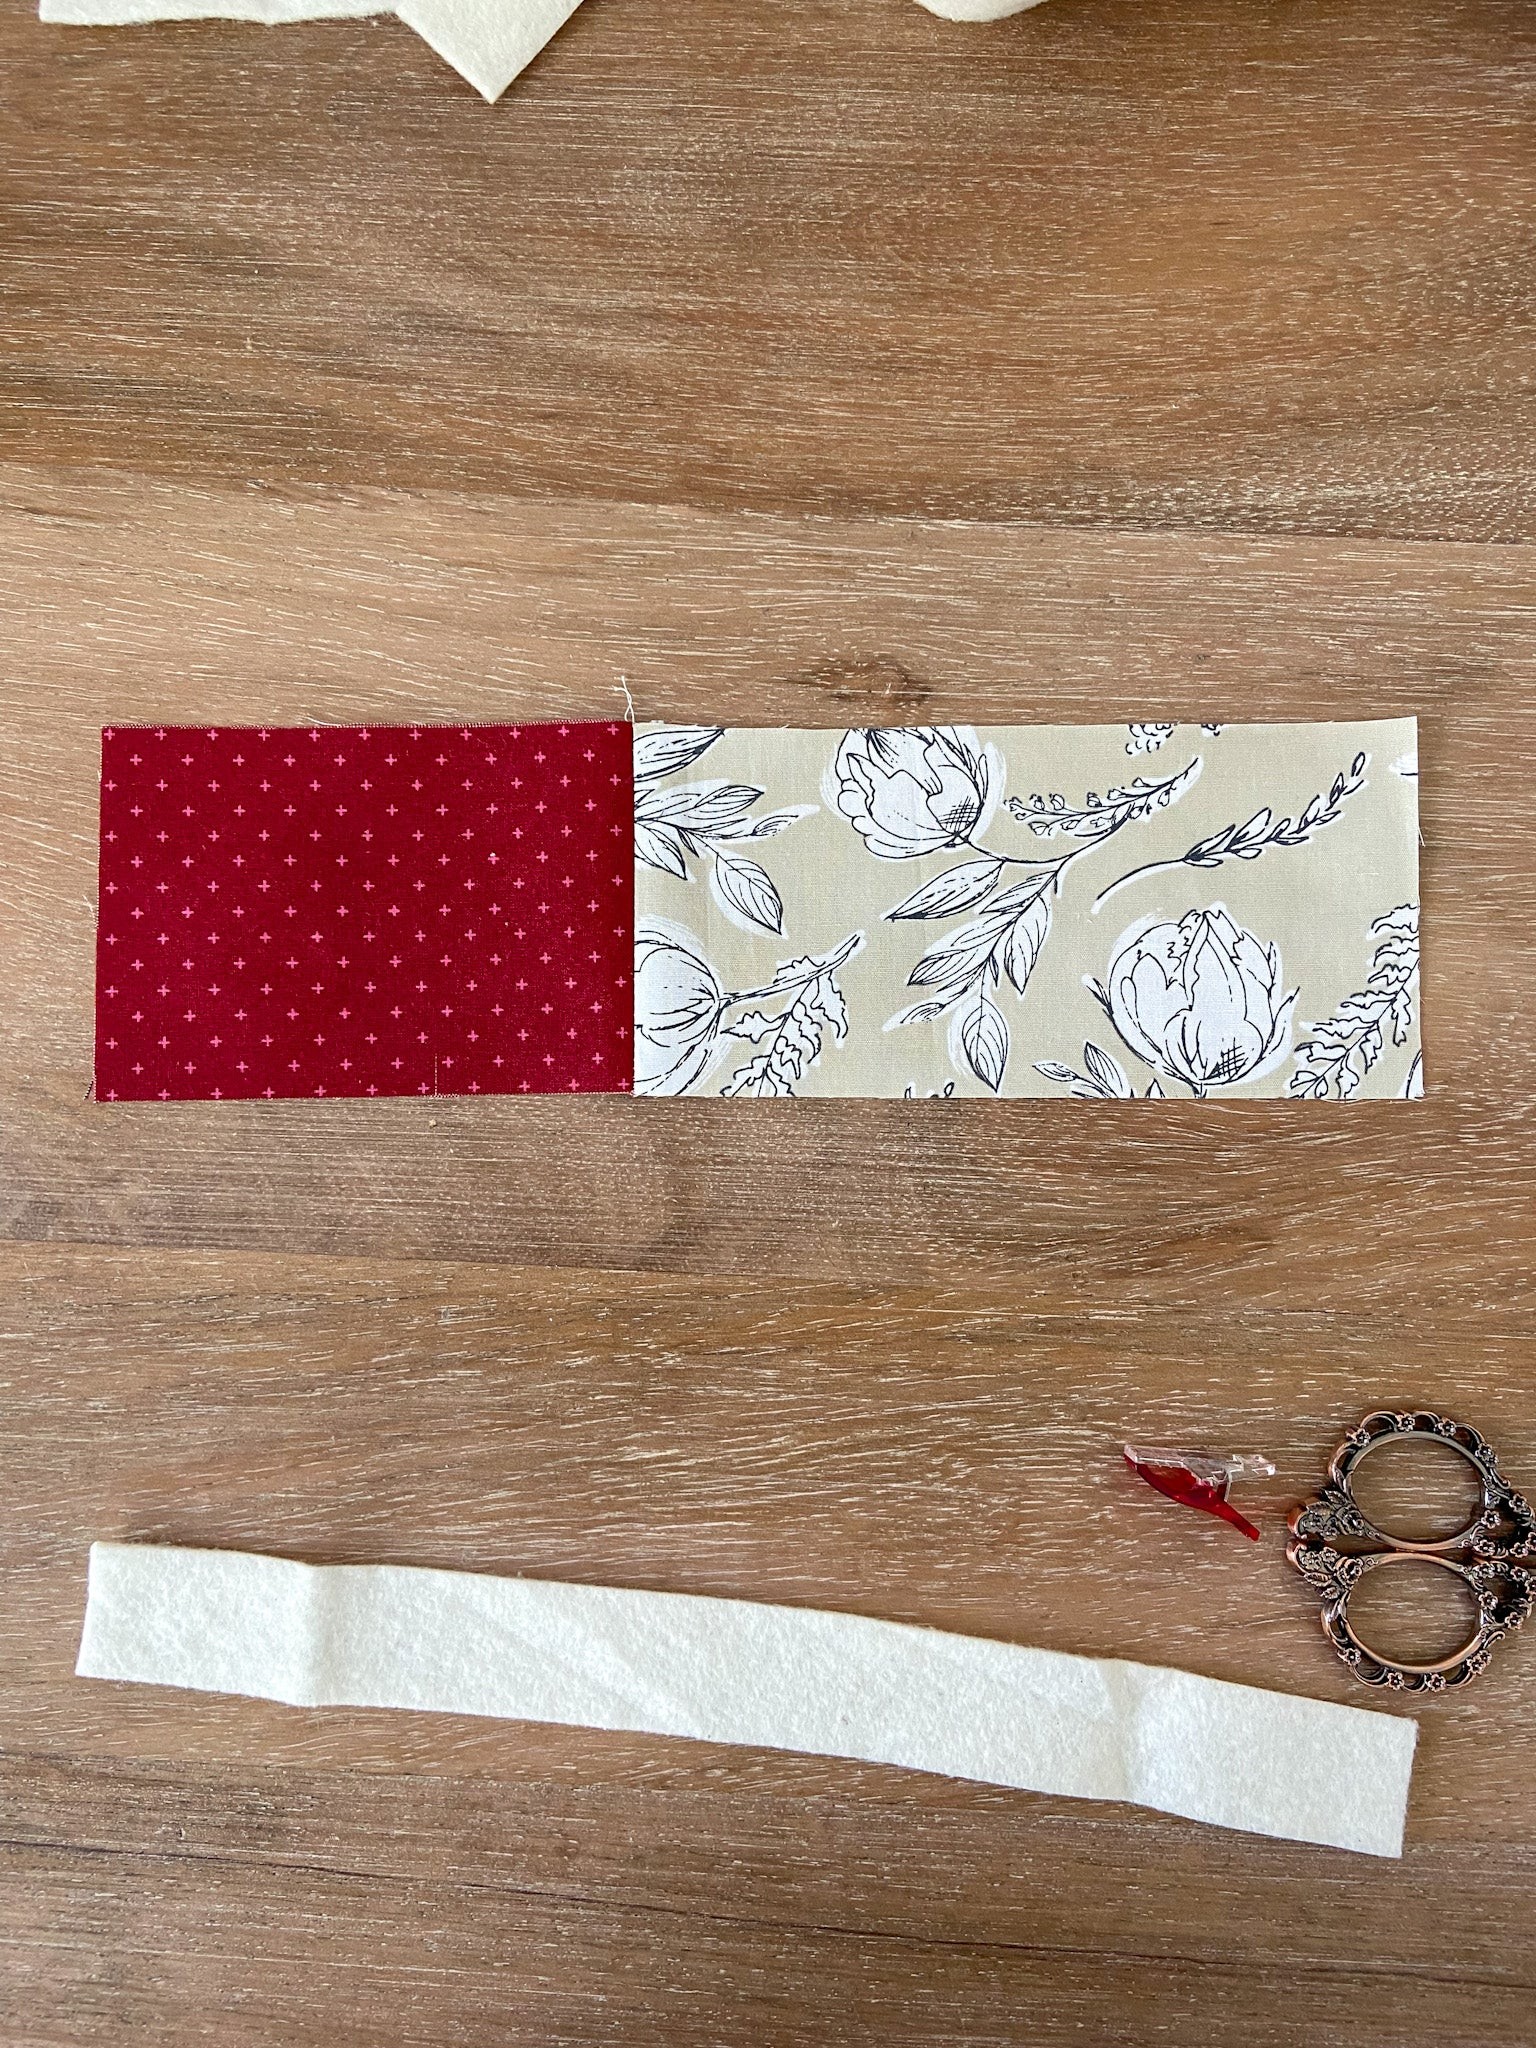
Take your two pieces of fabric and place them right sides together. Sew them along the short ends using a ¼” seam allowance. Once sewn, press the seam open with your iron to ensure a flat, neat finish. This creates one long strip of fabric that will form the base of your key fob.
2. Fold Fabric in Half Lengthwise and Press
Next, fold the fabric strip in half lengthwise, with the wrong sides facing each other. Press a crease along the fold using your iron. This crease will serve as a guide for centering the batting in the next step and helps create a clean, professional look for your DIY key fob.
3. Insert Batting into the Fabric
Open the folded fabric and place the piece of batting inside, aligning it with the crease you just pressed. Center the batting carefully, leaving approximately ¼” of fabric overhang on both ends. This overhang will be folded over to enclose the batting and create a padded key fob.
4. Fold Bottom Edge of Fabric Around Batting and Press
Now, fold the bottom edge of the fabric pieces up and around the batting. Press another crease along this fold with your iron. This step begins to enclose the batting securely within the fabric, giving shape to your handmade key fob.
5. Fold Top Edge Down and Press Again
Fold the top edge of the fabric down about ¼” over the batting. Press this fold to create a clean top edge. This fold, combined with the previous fold, fully encloses the batting and prepares the edges for sewing.
6. Insert Key Fob Material into Key Ring
Take your key fob material (the fabric strip you’ve been working on) and insert it into the key ring. Use clips to hold the folded edges of the fabric together securely around the key ring hardware. This step ensures the key ring is properly positioned and the fabric stays in place for sewing.
7. Fold Key Fob in Half to Align Raw Ends
Fold the entire key fob in half so that the two raw ends of the fabric are aligned. This folding step prepares the raw ends to be sewn together, creating the loop shape of the key fob.
8. Slightly Unfold and Align Fabric Pieces
Slightly unfold the raw ends so that the entire 3″ width of the fabric pieces are aligned. Carefully move the batting out of the way so you avoid sewing over it in the seam allowance. Pin the fabric in place to secure it for sewing the loop closure.
9. Sew a ¼” Seam to Create a Closed Loop
Sew a ¼” seam along the aligned raw edges. This seam will create a closed loop, forming the main structure of your fabric key fob. Backstitch at the beginning and end of the seam to secure it.
10. Press the Seam Open with Your Fingers
Use your fingers to gently press the seam open. This helps to reduce bulk and allows the seam to lay flatter, contributing to a more professional finish for your DIY key fob.
11. Reposition the Batting Pieces
Replace the batting pieces back to their original positions inside the fabric loop. Ensure they are sitting neatly and evenly within the fabric folds.
If the batting pieces overlap after sewing, trim them so they butt up against each other without overlapping. This ensures a smooth finish and avoids bulk in your scrap fabric key fob.
12. Fold Fabric Back Over Batting and Clip
Fold the fabric back over the batting as it was originally folded. Clip the edges in place to hold the fabric layers together for the final stitching.
13. Start Sewing Around the Loop Edge
Bring your bobbin thread up through the needle plate, and pull both the needle and bobbin threads to have about 5″ of thread length. This extra thread will be used to tie a knot and bury the threads later. Start sewing about ⅛” from the edge around the entire loop. Move the hardware and clips as you sew, carefully maintaining an even seam.
14. Stop Sewing to Bury Threads
Stop sewing with your needle down about 2-3 inches before you reach your starting point. This break is essential for burying the threads and creating a seamless finish.
15. Tie a Knot with Threads and Bury Them
Gently pull on one of the threads to bring the other thread to the same side. Tie both threads in a secure knot. Thread a needle with both thread tails, insert the needle close to the knot, and bring it out of the fabric about 1-2 inches away, being careful not to go through all layers of the key fob.
16. Pop the Knot Underneath and Trim Threads
Gently pull on the thread so that the knot “pops” underneath the fabric surface, hiding it neatly. Trim the excess thread tails close to the fabric surface.
17. Continue Stitching and Bury Threads Again
Continue stitching from where you stopped in step 14 until you reach the beginning of your seam, completing the loop stitching. Repeat steps 14-16 to bury the threads at the end of this seam as well, ensuring a clean and secure finish all around the loop edge of your DIY key fob.
18. Repeat for the Other Edge of the Key Fob
Repeat steps 13-17 for the other long edge of the key fob. This will finish both long sides, creating a durable and professional-looking handmade key fob.
19. Position Hardware and Clip for Final Stitching
Arrange the hardware in the middle of the accent fabric section of your key fob. Clip the key fob around the hardware, positioning it where you want the final stitching to secure the hardware in place.
20. Stitch Across the Width to Secure Hardware
Starting with about 5″ of bobbin and needle thread above the needle plate again, stitch across the width of the key fob, right next to the hardware. For extra security, stitch forward, then backward, and then forward again over the same line. Bury the thread tails as explained in steps 15-16 to finish neatly. This final stitch securely attaches the hardware and completes your easy to make key fob.
21. Enjoy Your New Key Fob!
Congratulations! You’ve successfully learned how to make a key fob. Enjoy your handmade creation or give it as a thoughtful, personalized gift. These key fobs are perfect for stocking stuffers, teacher gifts, party favors, or just a fun way to use up scrap fabric.
Once you start making these, you’ll find they are quite addictive! Happy sewing, and enjoy creating many more DIY key fobs!