Is your car key fob refusing to unlock your doors? Before you panic or schedule an expensive dealership visit, the solution might be simpler than you think: a dead battery. Luckily, replacing the battery in your key fob is a straightforward task you can easily do yourself. This guide will walk you through how to open your key fob and change the battery, saving you time and money.
Modern car key fobs are essential for vehicle access and security, but they rely on battery power to function. When the battery weakens, you might experience decreased range, inconsistent locking/unlocking, or complete failure. Recognizing these signs early can save you from being stranded. Changing the battery is a basic maintenance task that any car owner can handle with a few simple tools and a little patience.
Identifying Your Key Fob Type
Before you start, it’s helpful to understand that key fobs come in various designs. While the battery replacement process is generally similar, the way you open the fob might differ slightly. Common types include:
- Fobs with a Notch: These are the most common and easiest to open. They feature a small slot or notch along the seam where the two halves of the fob meet.
- Fobs with Screws: Some fobs, especially those from luxury brands or older models, might be secured with tiny screws. You’ll need a small screwdriver to open these.
- Fobs with a Hidden Key Release: Certain fobs require you to first remove a physical key (often hidden within the fob itself) to reveal the opening mechanism or screws.
Understanding your key fob type will make the opening process smoother and prevent accidental damage.
Tools You’ll Need
Gather these simple tools before you begin:
- New Battery: Identify the correct battery type for your key fob. This information is usually found in your car owner’s manual or by opening the fob and checking the old battery. Common types include CR2032, CR2025, and CR1632. You can purchase these at most drugstores, supermarkets, or online.
- Small Flathead Screwdriver or Pry Tool: A small flathead screwdriver is ideal for fobs with notches. You can also use a butter knife, a guitar pick, or a specialized plastic pry tool for electronics to avoid scratching the fob casing.
- Phillips Head Screwdriver (if needed): If your fob has screws, you’ll need a small Phillips head screwdriver of the appropriate size.
- Soft Cloth (optional): Using a soft cloth can protect the fob’s surface from scratches during the opening process.
Having everything ready will make the battery replacement quick and efficient.
Step-by-Step Guide: How to Open a Key Fob and Change the Battery
Follow these steps to safely open your key fob and replace the battery:
Step 1: Locate the Opening Point
Examine your key fob closely. Look for:
- A Notch: This is usually a small indentation or slot along the side seam of the fob. It’s the most common opening point for modern key fobs.
- Screws: Check the back or sides of the fob for tiny screws. If you see screws, you’ll need a Phillips head screwdriver.
- Key Release Button or Latch: Some fobs have a button or latch that releases a physical key. Remove the key first if applicable, as this might reveal the opening mechanism.
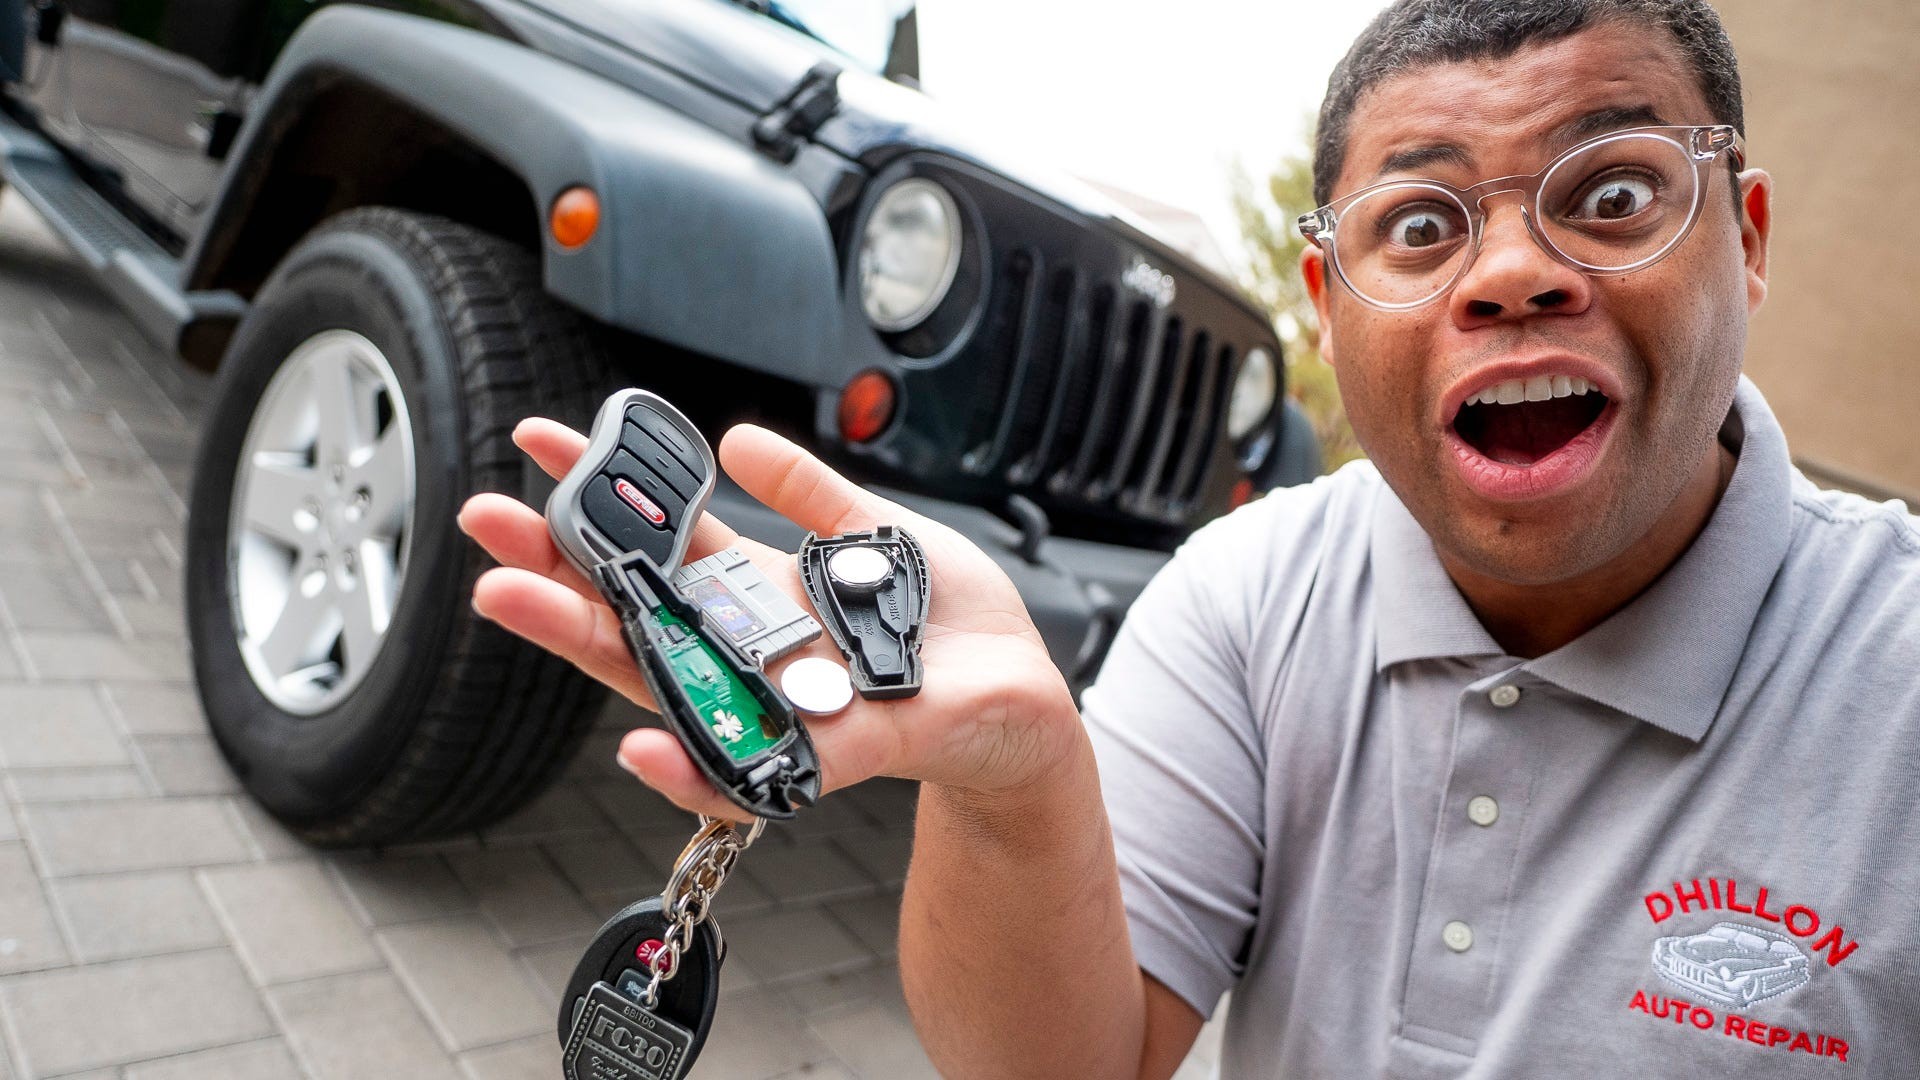 Learn how to open your car key fob to replace the battery with this simple guide, featuring hands using a screwdriver.
Step 2: Opening the Fob
For Fobs with a Notch:
- Insert the Flathead Screwdriver or Pry Tool: Gently insert the tip of your flathead screwdriver or pry tool into the notch.
- Twist or Pry Gently: Apply gentle twisting or prying pressure to separate the two halves of the fob. Avoid using excessive force, as you could damage the plastic casing. Work your way around the seam if needed, gently prying at different points until the fob pops open.
For Fobs with Screws:
- Locate and Remove Screws: Identify all the screws on your key fob.
- Unscrew Carefully: Use the correct size Phillips head screwdriver to carefully unscrew and remove all screws. Place the screws in a safe place so you don’t lose them. Once the screws are removed, the fob should easily separate into two halves.
For Fobs with a Hidden Key Release:
- Release and Remove the Physical Key: Locate the key release button or latch on your fob. Press or slide it to release the physical key.
- Check for Notch or Screws: Once the key is removed, inspect the area where the key was housed. You might find a notch or screws that are now accessible. Proceed with opening the fob as described above for notched or screwed fobs.
Step 3: Battery Removal and Replacement
- Observe Battery Orientation: Before removing the old battery, carefully note its orientation (+ and – sides). Usually, the positive (+) side faces upwards, but it’s always best to double-check.
- Remove the Old Battery: The battery might be held in place by small clips. Gently pry the battery loose or use your fingertip to slide it out of its compartment.
- Insert the New Battery: Place the new battery into the compartment, ensuring it’s in the correct orientation (matching the +/- orientation of the old battery). Push it gently until it’s securely seated.
Step 4: Closing the Fob and Testing
- Reassemble the Fob: Carefully align the two halves of the key fob and snap them back together. Ensure they close securely and evenly.
- Replace Screws (if applicable): If your fob had screws, reinsert and tighten them gently. Avoid over-tightening, which could damage the plastic.
- Test the Fob: Press the unlock or lock button on your key fob to test if it works. The car doors should respond. If it works, you’ve successfully replaced the battery!
Tips for Key Fob Battery Replacement
- Work on a Clean, Flat Surface: This prevents screws or small parts from getting lost.
- Use Gentle Pressure: Avoid excessive force when opening the fob to prevent damage.
- Check Battery Type Before Buying: Ensure you purchase the correct replacement battery type.
- Dispose of Old Batteries Properly: Recycle your old batteries at designated collection points to protect the environment.
- Consider a Small Toolkit: If you frequently change batteries in devices, investing in a small electronics toolkit with various screwdriver sizes and pry tools can be helpful.
What to Do If It Still Doesn’t Work
If your key fob still doesn’t work after replacing the battery, consider these possibilities:
- Incorrect Battery Orientation: Double-check that you inserted the new battery in the correct orientation (+ and – sides).
- Battery Compatibility: Ensure you used the correct battery type for your key fob.
- Fob Damage: If the fob was dropped or damaged, internal components might be broken.
- Car Battery Issues: In rare cases, a problem with your car’s battery or receiver could be the issue.
If you’ve checked these points and your key fob still isn’t working, it might be time to consult your car dealership or a qualified automotive locksmith for further diagnosis and repair.
Changing your key fob battery is a simple and cost-effective way to resolve common key fob issues. By following these steps, you can regain full functionality of your key fob and avoid unnecessary dealership expenses.