Key fobs are essential everyday carry items, but often lack personality. If you’re looking to enhance your key fob with both style and practicality, crafting a Key Fob Leather wristlet is an excellent DIY project. Not only does a leather wristlet add a touch of sophistication to your keys, but it also makes them easier to locate and carry. This guide will walk you through creating your own custom key fob leather wristlet, adding a personal touch to your essential tech accessory.
DIY Leather Key Fob Wristlet: A Step-by-Step Guide
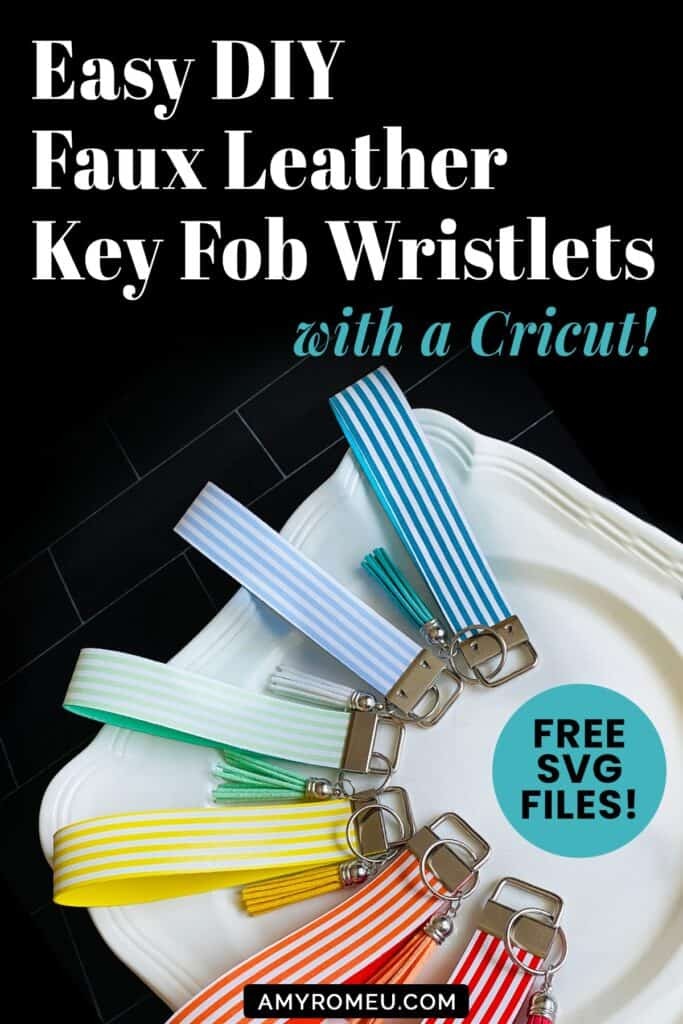
This project is perfect for beginners and experienced crafters alike, requiring minimal tools and materials. Whether you’re aiming to personalize your car key fob or create a stylish accessory for your house keys, a key fob leather wristlet is a durable and fashionable choice. We’ll be using faux leather for this tutorial, offering a cost-effective and versatile alternative to genuine leather, but the techniques are readily adaptable for real leather crafting.
For those who prefer visual learning, we also offer a video tutorial demonstrating the process of creating a key fob leather wristlet.
Want to explore more DIY key fob customization ideas? [CLICK HERE FOR MORE KEY FOB PROJECTS]
Ready to transform your key fob with a touch of leather? Let’s gather our materials and begin!
This guide contains affiliate links. If you make a purchase through these links, we may earn a small commission at no extra cost to you. Please see our full disclosure policy here.
Materials You’ll Need for Your Leather Key Fob Wristlet
Before starting your key fob leather wristlet project, ensure you have all the necessary materials. Gathering everything beforehand will streamline the crafting process and ensure a smooth experience.
- Cutting Mat (Strong Grip Recommended): A strong grip cutting mat, such as the Cricut Strong Grip (Purple) Cutting Mat, is ideal for working with faux leather. These mats provide the necessary adhesion to keep the material in place during cutting. You can find these mats at craft stores like Michael’s, Hobby Lobby, Joann’s, and Walmart, as well as online retailers like Amazon.
- Painter’s Tape (Blue): Blue painter’s tape is essential for securing the faux leather to the cutting mat. It provides sufficient hold without damaging the material. Available at hardware stores, Amazon, and even some grocery stores.
- Faux Leather: Choose your preferred faux leather. Consider patterned faux leather for the exterior and a contrasting color for the interior to add visual interest to your key fob leather wristlet. Etsy offers a wide variety of faux leathers, such as these striped faux leathers. Avoid chunky glitter faux leather, as it tends to shed glitter.
- Weeding Tool or Sharp Object: A weeding tool or any sharp object will be helpful for removing small cuts and details from the faux leather after cutting. Cricut tool sets, like this one from Amazon, include a weeding tool.
- Faux Suede or Leather Tassels (Optional): Tassels add a decorative element to your key fob leather wristlet. Amazon offers various faux suede tassel assortments in multiple colors, such as this option.
- Flat Nose Pliers (Two Pairs): Two pairs of flat nose pliers are needed to securely close the key fob hardware onto the leather. Baby Wubbers Chain Nose Pliers (Amazon) and Baby Wubbers Flat Nose Pliers (Amazon) are highly recommended for their precision.
- SVG File (Free Download Available): Download our free SVG file for the key fob leather wristlet shape from our Resource Library (Design #175). Get the password by filling out the form below or at the end of this guide.
- Key Fob Hardware: Purchase key fob hardware in the desired width to match your SVG file shape.
Crafting Your Leather Key Fob Wristlet: Step-by-Step Instructions
Now that you have gathered all your materials, let’s move on to the step-by-step instructions for creating your key fob leather wristlet. Follow these steps carefully to ensure a beautifully crafted and functional accessory for your keys.
Step 1 – Download the Free SVG File
Begin by downloading the free SVG cutting file for the keychain shape from our Resource Library. The password to access the library is available through the sign-up form above and at the end of this post.
Save the downloaded zipped folder to your computer in an easily accessible location. Remember where you save it, as you will need to locate it shortly. Before uploading the cutting file to Cricut Design Space, you must unzip or extract the files. Make note of the extracted file location for the next step.
Step 2 – Upload the SVG to Cricut Design Space
Open Cricut Design Space and click on NEW PROJECT to begin. Next, select UPLOAD from the left-hand side menu.
Click the UPLOAD IMAGE button, and then click BROWSE to find the unzipped SVG file you saved for this project on your computer.
Double-click the SVG file to import it into the upload screen in Design Space. If you encounter an “unsupported file type” error, ensure you have selected the correct file and that the SVG file is completely unzipped.
A preview of the key fob leather wristlet keychain shapes will appear. Click the green SAVE button to proceed.
After successful upload, the file will be visible as the first item in your “recently uploaded designs.”
Click on the uploaded design to select it (it will be outlined in green). Then, click the green INSERT IMAGES button in the bottom right corner.
Step 3 – Prepare the SVG for Cutting in Cricut Design Space
This action will import the two wristlet shapes into Cricut Design Space. You will notice two shapes: one is 1 inch wide, and the other is 1.25 inches wide. Select the shape that corresponds to the width of your key fob hardware and hide or delete the other shape. Your canvas should now display the chosen shape, ready for cutting.
IMPORTANT: Do not resize the rectangles. If, for any reason, the shapes are imported at an incorrect size, select both and manually adjust the height to 11 inches. Ensure the padlock icon is locked in the size menu to maintain proportional scaling.
For this project, we are applying heat transfer vinyl to the back of the faux leather before cutting. This technique enhances the edges of your key fob leather wristlet, providing a clean and finished look. If you intend to use thicker glitter HTV, this method may not be optimal. Refer to our YouTube video tutorial for an alternative approach suitable for glitter HTV.
Click on the green MAKE IT button located in the top right-hand corner to proceed to the cutting phase.
The mat preview screen will display the placement of your shape on the purple cutting mat. If necessary, drag the shape to a more adhesive area on your mat for better material grip.
Click the green CONTINUE button to move to the material settings.
Next, you need to choose your material setting. For faux leather, we recommend the “Faux Leather (Paper Thin)” setting. This setting automatically performs a double cut, ensuring clean and precise cuts. Additionally, select “MORE” pressure from the Pressure dropdown menu for enhanced cutting force.
Cricut Explore Air 2 users can set the Smart Set Dial to “Custom” and then select “Faux Leather (Paper Thin)” as the material setting, mirroring the Maker settings. Ensure you are using the Fine Point Blade. Cricut Joy users will require the 12-inch long cutting mat. Refer to this tutorial for detailed instructions on cutting faux leather with a Cricut Joy.
Step 4 – Fuse Faux Leather and Heat Transfer Vinyl
The key to achieving professional-looking edges on your key fob leather wristlet lies in fusing heat transfer vinyl to the back of the faux leather before cutting. This step not only adds a pop of color to the edges but also reinforces the material.
Cut a piece of faux leather and heat transfer vinyl slightly larger than the wristlet shape. Position them back-to-back, ensuring the decorative side of the faux leather faces outwards and the shiny side of the vinyl also faces outwards.
Place the faux leather and vinyl sandwich on a heat pressing pad. Cover it with a Teflon sheet or parchment paper to protect the materials. Press the HTV onto the back of the faux leather until the vinyl is fully adhered. An EasyPress Mini on the lowest setting works well for this. Alternatively, you can use a regular EasyPress or a household iron set to low heat without steam.
Carefully peel away the vinyl’s clear carrier sheet. If any bubbles appear during peeling, replace the carrier sheet and apply heat again. Complete adhesion of the vinyl to the faux leather is crucial for clean cuts and edge finishing.
Once the vinyl’s clear carrier sheet is removed, replace the cover sheet and press again for a few more seconds to ensure a strong bond.
Step 5 – Cut the Faux Leather Using Your Cricut
Position your fused faux leather on the purple strong grip cutting mat, with the decorative faux leather side facing down and the vinyl side up. Align it with the location indicated on your mat preview screen in Design Space.
Ensure the white star wheels on your Cricut machine are moved to the side of the roller bar to prevent them from rolling over the faux leather, which can cause unwanted marks.
Secure the faux leather to the mat on all sides using blue painter’s tape. Load the mat into your Cricut machine and press the ‘C’ button to initiate the cutting process.
Once the cut is complete, use your weeding tool to gently lift a corner of the cut shape to check if the cut is complete. If the cut is not all the way through, press the ‘C’ button again to repeat the cut without unloading the mat. Repeat this as needed until the cut is clean and complete.
Unload the mat and carefully remove the cut key fob leather wristlet shape. Press the cut shape one more time under a cover sheet to smooth out the edges of the vinyl where the blade cut. This step helps to seal the edges and gives a more polished finish.
If you wish to conceal the white edges of the faux leather, you can use Sharpie markers to color the edges. This simple technique can significantly enhance the finished look of your wristlet. As shown, a wristlet with a white edge and one with a yellow Sharpie-colored edge demonstrate the difference a bit of color can make, adding a refined touch to your key fob leather wristlet.
Step 6 – Attach the Key Fob Wristlet Hardware
Fold the cut wristlet shape in half, aligning the ends precisely.
Carefully insert the folded edges of the faux leather into the opening of the key fob hardware. Using the pliers that typically come with the hardware set, firmly clamp down on the hardware. Continue clamping until the jaws are fully closed and securely grip the key fob leather edges. Ensure a tight closure to prevent the leather from slipping out.
For an added decorative touch, consider attaching a tassel to your key fob leather wristlet. To do this, open a jump ring using your pliers, slide on a tassel, attach the keyring, and then close the jump ring securely.
Congratulations! You have successfully crafted your own key fob leather wristlet. These wristlets are not only stylish accessories but also practical solutions for keeping your keys organized and accessible.
Are you planning to create these key fob leather wristlets? We would love to see your creations! Share them with us by tagging us on Instagram @yourinstagramhandle.
Looking for more key fob customization projects and repair guides? [CLICK HERE TO EXPLORE keyfobx.com]
Until our next DIY project… happy crafting!