Are you struggling with a malfunctioning key fob for your Range Rover P38? Like many owners of this classic vehicle, you might find yourself facing issues with your key fob’s remote locking and unlocking functions. Before you rush to expensive replacements, consider this: often, the solution is simpler and more affordable than you think. This guide will walk you through using a Key Fob Repair Kit to breathe new life into your existing remote, saving you time and money.
Many Range Rover P38 owners have encountered similar frustrations. Imagine the scenario: you approach your vehicle, press the unlock button on your key fob, and nothing happens. Perhaps you’ve already changed the battery, only to be met with the same unresponsive silence. This was the exact situation I faced with my ’99 Range Rover. After some investigation and drawing upon the wealth of knowledge within the online Range Rover community, I discovered a common culprit and a DIY fix using readily available tools and a bit of patience – all centered around the concept of a key fob repair kit, even if it’s assembled from common household items and donor parts.
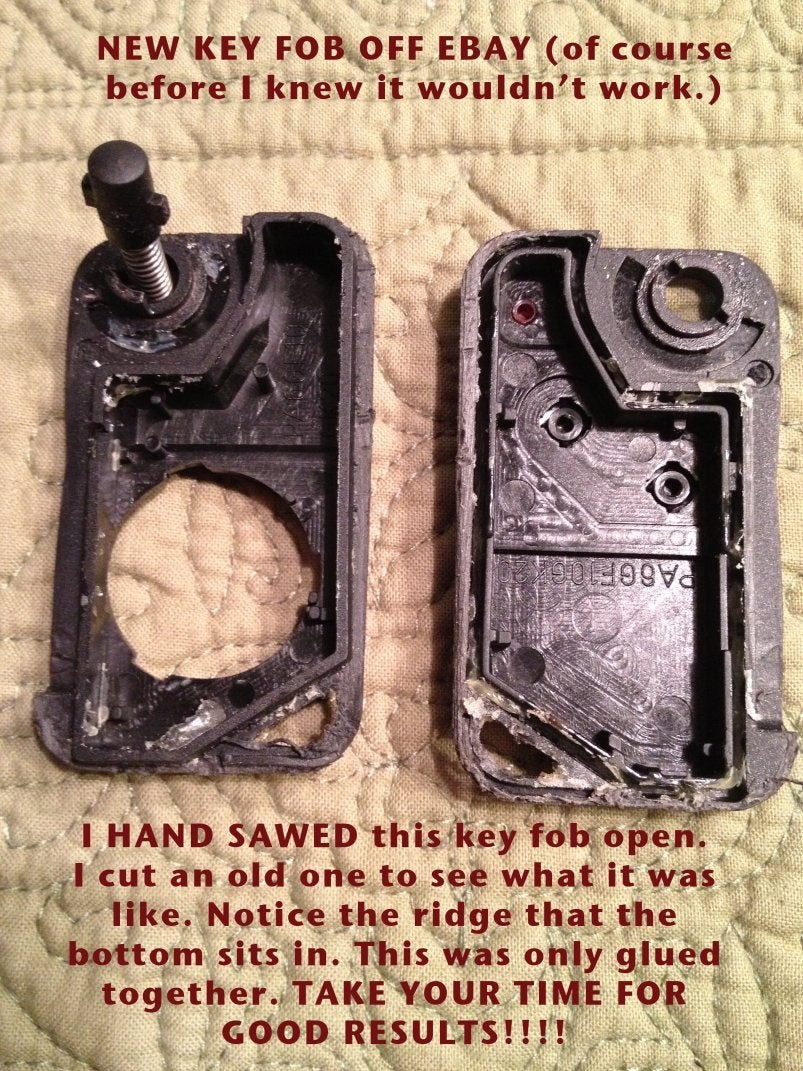
Initially, the previous owner of my truck believed the key fob issue was simply a dead battery. However, a fresh battery didn’t solve the problem, and a cheap replacement fob from eBay proved equally useless. Closer inspection of my original fob revealed a missing “battery bridge,” a small but crucial metal component responsible for completing the circuit. This discovery was a turning point. It confirmed that my original fob was likely functional but simply needed a minor repair. And this is where the idea of a key fob repair kit comes into play – it’s about having the right components and tools to address these common issues.
The exciting part? I successfully synchronized my original fob after identifying the problem, proving that repair was indeed possible. This experience led me to delve deeper into the process, ultimately leading to this guide. Using a spare key fob from a junkyard for practice, I meticulously worked out the best method to open the fob, identify the faulty component, and perform the necessary repair. This guide shares that knowledge, effectively acting as your step-by-step manual for using a DIY key fob repair kit approach.
This guide focuses on repairing the common “battery bridge” issue in Range Rover P38 key fobs. While a dedicated key fob repair kit for this specific model might be hard to find as a single packaged product, we’ll outline how to assemble your own kit using common tools and potentially donor parts. Let’s get started on bringing your key fob back to life!
Tools You’ll Need to Assemble Your Key Fob Repair Kit:
Before you begin, gather these essential tools. Think of this as assembling your personalized key fob repair kit:
- Pencil Soldering Gun: Crucially, use a pencil soldering gun. Larger soldering irons generate excessive heat and can damage the delicate circuit board and electronic components within the key fob. The existing solder on the board might be sufficient, potentially eliminating the need for additional solder.
- Small Hacksaw Blade: For carefully cutting open the key fob casing.
- Flat Head Screwdriver: To gently pry open the fob after cutting.
- Tweezers: Essential for handling the small “battery bridge” and positioning it during soldering.
- Super Glue or Epoxy: To reassemble the key fob casing securely after repair. Choose your preferred adhesive.
- Magnifying Glass: Helpful for detailed work, especially when dealing with tiny components like the battery bridge.
- Fine Scotch (Optional but Recommended): For celebrating a successful repair! A cigar is also a worthy addition to your celebratory key fob repair kit completion.
Step-by-Step Key Fob Repair Guide:
STEP 1 – Carefully Open Your Original Key Fob:
Opening the key fob requires patience and care. Avoid rushing or forcing it open, as this can lead to damage, particularly to the key ring attachment point. While some might suggest using a Dremel, a hand-operated hacksaw blade offers more control and reduces the risk of cutting too deep and damaging the internal components.
I recommend using a small hacksaw blade and a vise. To protect the fob’s plastic casing from the vise grips, wrap the non-cutting areas in a towel. Cut slowly and deliberately along the seam of the key fob.
Caution: When the fob finally separates, do so slowly and carefully! Inside, you’ll find a spring mechanism that makes the key blade “pop” open. This spring, along with the button that activates it, can easily fly out and get lost if you’re not cautious.
AVOID THIS – Rushing Can Cause Damage!
Rushing the opening process can lead to unsightly damage and potentially compromise the integrity of the key fob casing. Take your time to ensure a clean and controlled opening.
STEP 2 – Familiarize Yourself with the Key Fob Circuit Board:
Before proceeding with the repair, take a moment to study the circuit board inside your key fob. The images below show the key fob boards from a ’99 Range Rover (the one being repaired) and a ’96 Range Rover (the donor fob). Note the subtle differences in the electronic components between the two.
Crucially, identify the “Battery Bridge.” This small metal piece, often missing or detached in faulty fobs, is essential for battery contact and circuit completion. In the first image, you can clearly see the “Battery Bridge” on the intact board. Also, observe the board on the right in the first image – it appears someone previously attempted a repair, indicated by the melted area at the top.
STEP 3 – Remove the “Battery Bridge” from the Donor Board:
Now, using your pencil soldering gun, carefully heat the solder points securing the “battery bridge” on your donor circuit board (the board from the spare key fob). Once the solder melts, use tweezers to gently lift and remove the “battery bridge.”
STEP 4 – Solder the “Battery Bridge” onto Your Original Board:
Next, carefully position the “battery bridge” onto your original key fob circuit board where the original was missing or detached. Ensure the two contact points of the “battery bridge” align correctly with the designated holes on the board.
Heat the solder points on your original board and use tweezers to place the “battery bridge firmly into position. Ensure it sits flush and is securely soldered.
Important Note: Move the donor circuit board away from your work area to avoid accidentally reassembling the key fob with the wrong board. This is an easy mistake to make when you’re focused on the small components!
STEP 5 – Ensure the “Battery Bridge” Makes Proper Contact:
After soldering the “battery bridge,” test the connection before fully reassembling the key fob. In some cases, simply soldering the bridge might not be enough to ensure consistent battery contact.
In my experience, I discovered that the “battery bridge” needed to be slightly raised to make proper contact with the metal piece in the battery holder. If your fob doesn’t work after reassembly, this could be the issue.
To address this, I used a tiny piece of wire placed under the “battery bridge” to elevate it slightly. This ensured consistent contact and resolved the intermittent connection problem. This step might not be necessary for all key fobs, but it’s a valuable troubleshooting tip.
STEP 6 – Secure and Test Before Final Assembly:
Before applying glue and permanently sealing the key fob, thoroughly test its functionality. Reassemble the key fob casing without glue and test the buttons. Ensure the LED light on the fob illuminates when you press the buttons. Repeatedly test the key fob at this stage. It’s far easier to troubleshoot any issues now than after the fob is glued together!
Reassembling the key fob casing involves carefully winding the spring mechanism that operates the key blade. The spring has a small metal arm that needs to be correctly positioned to lock it in place. Refer to the images below for proper spring placement.
Place the key blade, spring, and button back into the key fob bottom. Wind the spring counter-clockwise approximately three full turns. Hold it firmly to prevent it from unwinding.
Position the circuit board in the top half of the key fob casing. Carefully align the top and bottom halves and press them together. The key blade button should protrude slightly, ready to activate the spring.
STEP 7 – Final Assembly, Battery Installation, and Synchronization:
Once you’re confident in the key fob’s functionality, disassemble it one last time. Apply a small amount of super glue or epoxy to the corners and along the seams of the key fob casing. Press the two halves firmly together and allow the adhesive to cure completely.
Install the battery, ensuring the arrows on the battery align correctly. Make sure the rubber o-ring is in place on the battery compartment to prevent the bottom from loosening.
Finally, synchronize the repaired key fob with your Range Rover. Use the following synchronization procedure:
- Ensure your Range Rover is unlocked.
- Insert the key into the driver’s door lock.
- Press and hold the “lock” button on the key fob.
- While holding the “lock” button, turn the key to the “lock” position (right) in the door. The truck should lock. The LED on the key fob should blink rapidly. Hold for 3 seconds.
- Continue holding the “lock” button and return the key to the upright (neutral) position.
- Press and hold the “unlock” button on the key fob.
- While holding the “unlock” button, turn the key to the “unlock” position (left) in the door. The truck should unlock. The LED on the key fob should blink rapidly. Hold for 3 seconds.
- Continue holding the “unlock” button and return the key to the upright position.
Your key fob should now be synchronized! Test the lock and unlock functions to confirm.
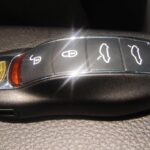
The Finished Repair – A Job Well Done!
If you followed these steps carefully and took your time, your repaired key fob should look nearly as good as new. A slow and methodical approach to opening the fob minimizes visible signs of repair.
Congratulations! You’ve successfully repaired your Range Rover P38 key fob using a DIY key fob repair kit approach and saved yourself the expense of a new replacement. Now, it’s time to celebrate your accomplishment!
Enjoy a well-deserved drink! You’ve earned it.
If you have any questions or encounter any issues during your key fob repair kit project, feel free to ask. I’m here to help in any way I can!