Good morning! Are you looking for a fun and easy DIY project? Today, we’ll explore how to create a personalized Picture Key Fob using a Cricut machine. This is a fantastic way to make unique gifts or add a personal touch to your own keys. You’ll be amazed at how simple it is to cut various materials with your Cricut, making projects like this accessible to everyone. Let’s dive in and see what materials we can use and how to set up your machine for perfect cuts.
The versatility of a Cricut machine is truly impressive. You can cut a wide array of materials, far beyond just paper and cardstock. Here’s a glimpse of the diverse materials compatible with Cricut machines:
- 3M Post It Notes
- Adhesive Magnetic Sheets
- Aluminum Foil
- Aluminum Metal
- Canvas
- Cardstock
- Chipboard
- Construction Paper
- Cork Board, Adhesive Backed
- Craft Foam
- Cutting Mat Protector
- Duck Tape
- Fabric
- Felt
- Foam
- Foil, Adhesive Backed
- Iron-On Material
- Leather
- Magnet Sheets
- Paint Chips
- Paper
- Watercolor Paper
- Photo Paper
- Poster Board
- Premium Outdoor Vinyl
- Printable Tattoo Paper
- Stencil Vinyl
- Sticker Paper
- Transparency
- Vellum
- Vinyl
- Washi Sheets
- Washi Tape
- Wax Paper
- Window Cling
- Wood (thin)
- Wrapping Paper
For this picture key fob project, we’ll be using faux leather and transparency paper. The Cricut cuts through both of these materials with ease, allowing for crisp and clean designs. Setting your Cricut machine to handle different materials is straightforward, and we’ll guide you through that process as well. So, gather your supplies, and let’s get started crafting these charming picture key fobs!
(Affiliate links are included for your convenience.)
Supplies Needed:
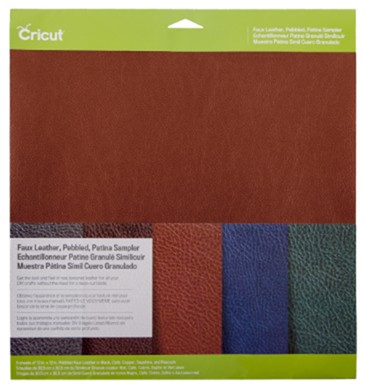
- Pebbled Faux Leather, Patina Sampler
- Cricut Explore Air™ machine
- Transparency paper
- Cricut Standard Grip Cutting Mat, 12×12
- Key rings (1 small, 1 large per fob)
- Eyelets
- Crop-a-dile or eyelet setter
- Hot glue gun
- Key fob cut file from Cricut Design Space
- Your favorite photos
First, let’s talk about the faux leather. The Pebbled Faux Leather from Cricut is fantastic for this project. The texture adds a professional and stylish touch to your picture key fob. The variety of colors available in sampler packs offers numerous creative possibilities for your personalized crafts.
Next, access Cricut Design Space to find a suitable cut file. A DIY picture key fob cut file is readily available and easy to use. Simply search for “key fob” within the design library to locate a template that fits your style.
Setting Your Cricut Machine for Faux Leather
Since faux leather isn’t a standard setting on the Cricut dial, you’ll need to adjust it to “Custom.” Turn the dial on your Cricut Explore Air™ to the “Custom” setting to access a wider range of material options.
Once you select “Custom,” Cricut Design Space will present you with a list of materials. Scroll through the options and choose “Faux Leather” to ensure the correct blade pressure and cutting depth for your picture key fob components.
After selecting faux leather, send the design to your Cricut machine to begin cutting. The machine will precisely cut the faux leather into the key fob shapes. It’s a remarkably easy process that yields professional-looking results for your picture key fob.
Tip for Cutting Faux Leather: Always use the Standard Grip Cutting Mat (the green one) when working with faux leather to ensure the material stays in place during cutting. This will prevent slipping and ensure clean, precise cuts for your picture key fob pieces.
Preparing the Transparency and Photos
Next, you’ll cut the transparency pieces that will protect and overlay your photos in the picture key fob. Remember to adjust your Cricut cut settings for transparency paper before proceeding.
Once the transparency pieces are cut, use one as a template to trace and cut your chosen photos to the correct size. Scissors work perfectly for trimming your photos to fit neatly within the picture key fob.
Assembling Your Picture Key Fob
Now it’s time to assemble your picture key fob. Using a hot glue gun, carefully glue the transparency piece over your photo and then attach it to the faux leather pieces. Hot glue works quickly and effectively to secure all layers together.
To add a professional finish and secure the key ring, use a Crop-a-dile or similar tool to set an eyelet at the top of the picture key fob. This reinforces the fob and provides a sturdy attachment point for the key ring.
Finally, attach the key rings. Using both a smaller and a larger key ring on each picture key fob can add visual interest and make it easier to attach to keys or bags.
These picture key fobs are perfect for personalized gifts, especially for grandparents or loved ones. They’re a thoughtful way to carry cherished memories wherever you go.
If you enjoyed this picture key fob tutorial, explore more photo gift ideas! Click on the images below to find tutorials for other creative photo projects.
Photo Pendant Tutorial
Photo Block Puzzle Tutorial
Washi Tape Photo Plaque Tutorial
DIY Photo Memory Board Tutorial
DIY Canvas Print Tutorial
Let us know in the comments what kind of photo gifts you enjoy making or giving. Which projects would you like to try with your Cricut? We’d love to hear your creative ideas!
Thank you for visiting our blog today! We hope you found this tutorial helpful and inspiring. Happy crafting!