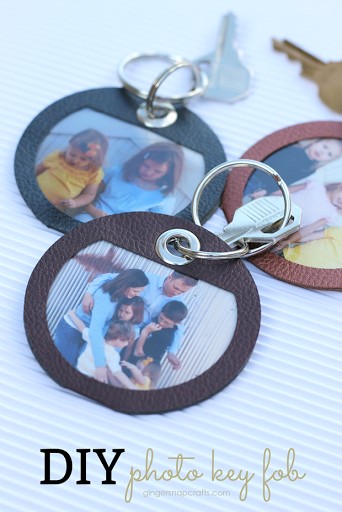
Looking for a unique and personal way to keep your loved ones close? DIY photo key fobs are the perfect solution! These charming accessories not only add a personal touch to your keys but also make thoughtful, heartfelt gifts. With just a few simple supplies and a dash of creativity, you can craft beautiful key fobs showcasing your favorite pictures. Whether it’s family portraits, pet snapshots, or scenic memories, transforming pictures into key fobs is a delightful project.
This guide will walk you through creating your own picture-perfect key fobs using a Cricut machine, making the process easy and enjoyable. We’ll explore the materials you’ll need, the simple steps to follow, and even inspire you with picture ideas for truly personalized key fobs. Get ready to turn your cherished photos into everyday treasures!
Materials You’ll Need for Picture Key Fobs
To embark on your DIY photo key fob adventure, gather these essential supplies. Having everything at hand will ensure a smooth and fun crafting experience.
- Faux Leather: This material provides a durable and stylish base for your key fob. Faux leather comes in various colors and textures, allowing for creative customization. Consider using a sampler pack for a range of options.
- Transparency Paper: Clear transparency paper acts as a protective layer for your photos, giving your key fob a professional finish and safeguarding the pictures from scratches and wear.
- Cricut Machine: A Cricut Explore Air™ or similar cutting machine is ideal for precisely cutting the faux leather and transparency paper into the desired key fob shapes. The Cricut ensures clean and accurate cuts, crucial for a polished final product.
- Cricut Standard Grip Cutting Mat: This green-colored mat provides the right amount of stickiness to hold your materials in place while they are being cut by the Cricut machine.
- Key Rings: Choose key rings in your preferred size and style. You can use a combination of small and large rings for each key fob to add visual interest.
- Eyelet and Crop-a-dile or Eyelet Setter: An eyelet and setter (like a Crop-a-dile) are used to create a secure hole in the key fob for attaching the key ring. This adds durability and a professional touch to your handmade key fobs.
- Hot Glue Gun: A hot glue gun is essential for quickly and securely assembling the layers of your key fob. Hot glue creates a strong bond, ensuring your photo key fob stays intact.
- Key Fob Cut File (Cricut Design Space): Cricut Design Space offers pre-designed key fob cut files that simplify the process. Search for “key fob” within Design Space to find readily available templates.
- Your Favorite Photos: The heart of your project! Select photos you love and want to showcase. Consider photos of family, friends, pets, favorite places, or memorable events.
Step-by-Step Guide to Crafting Your Photo Key Fobs
With your materials ready, let’s dive into the process of creating these adorable photo key fobs. Follow these simple steps to bring your picture key fob ideas to life.
1. Prepare Your Materials and Cricut Machine:
Begin by gathering all the supplies listed above. Ensure your Cricut machine is set up and ready to use. Open Cricut Design Space and locate a key fob cut file. There are many free and paid options available.
2. Cutting the Faux Leather:
Place a piece of faux leather onto the green Standard Grip Cutting Mat. If your faux leather type isn’t listed on the Cricut dial, turn the dial to “Custom.” In Cricut Design Space, select “Faux Leather” from the list of custom materials. Send the cut file to your Cricut machine. The machine will precisely cut the faux leather into the key fob shape.
3. Cutting the Transparency Paper:
Next, prepare to cut the transparency paper. Place a sheet of transparency paper on the Standard Grip Mat. Adjust your Cricut settings for transparency paper (usually a lighter setting than faux leather). Cut the same key fob shape from the transparency paper. These clear pieces will protect your photos within the key fob.
4. Preparing Your Photos:
Print or select the photos you want to use in your key fobs. Place a transparency paper cutout over your photo and trace around it. Cut out your photos using scissors, ensuring they are slightly smaller than the transparency cutout so they fit neatly inside the key fob.
5. Assembling the Key Fob:
Now it’s time to assemble your photo key fob. Layer the faux leather pieces with a transparency piece on top of a photo. Use a hot glue gun to carefully glue the layers together. Be precise with the glue to avoid any excess showing.
6. Adding the Eyelet and Key Ring:
Use a Crop-a-dile or eyelet setter to create a hole at the top of the key fob and insert an eyelet. This reinforces the hole and provides a sturdy anchor for the key ring. Attach the key ring to the eyelet.
7. Finishing Touches:
Inspect your finished photo key fob. Ensure all layers are securely glued and the key ring is firmly attached. Trim any stray glue threads for a clean, professional look. Repeat these steps to create as many photo key fobs as you desire!
Picture Ideas to Personalize Your Key Fobs
The beauty of DIY photo key fobs lies in their personalization. Here are some inspiring picture ideas to make your key fobs truly unique and meaningful:
- Family Photos: Use family portraits, individual photos of children or parents, or fun group shots. These make heartwarming gifts for relatives.
- Pet Pictures: Showcase your furry friends! Pet photos are always a hit and add a touch of personality to your keys.
- Travel Memories: Use pictures from your favorite vacations or scenic landscapes that hold special meaning.
- Friendship Photos: Create key fobs with photos of you and your best friends as a token of your bond.
- Baby Pictures: Adorable baby photos make sweet key fobs, especially for new parents or grandparents.
- Monogram or Initial: Instead of a photo, use a stylish monogram or initial for a chic and personalized touch. You can design these in Cricut Design Space.
- Inspirational Quotes: Print out miniature inspirational quotes or affirmations and use them in your key fobs for a daily dose of motivation.
- Sports Teams or Hobbies: Show your support for a favorite sports team or hobby by using logos or related images.
Perfect Gift Idea: Photo Key Fobs
DIY photo key fobs are not just fun to make; they also make incredibly thoughtful and personalized gifts. Consider these occasions for gifting your handmade picture key fobs:
- Gifts for Grandparents: Grandparents adore photos of their grandchildren. A photo key fob is a perfect way for them to carry those precious faces wherever they go.
- Mother’s Day or Father’s Day: A key fob with family photos or pictures of shared memories is a heartfelt gift for parents.
- Birthday Presents: Personalize a key fob with a photo that resonates with the birthday recipient’s interests or memories.
- Holiday Gifts: Photo key fobs are wonderful stocking stuffers or small gifts for Christmas, Hanukkah, or other holidays.
- Teacher Appreciation Gifts: A key fob with a class photo or a thoughtful message is a unique and personal gift for teachers.
- Friendship Tokens: Give your friends photo key fobs as a symbol of your friendship and shared experiences.
- Party Favors: For special events, consider making photo key fobs as personalized party favors for guests.
Tips for Stunning Picture Key Fobs
To ensure your DIY photo key fobs turn out beautifully, keep these helpful tips in mind:
- Photo Quality: Use high-resolution photos for the best clarity and visual appeal in your key fobs.
- Material Choice: Experiment with different colors and textures of faux leather to match your photos or personal style.
- Cutting Mat Grip: Ensure your Standard Grip Cutting Mat is sticky enough to hold the faux leather and transparency paper securely during cutting. If it’s losing stickiness, consider cleaning or replacing it.
- Glue Sparingly: Use hot glue in small amounts to avoid excess glue seeping out the sides of your key fob.
- Precision Cutting: Take your time when cutting both the faux leather and transparency paper with your Cricut for clean, crisp edges.
- Secure Eyelets: Make sure the eyelet is securely set to prevent it from pulling out and ensure the key ring is firmly attached.
- Consider Double-Sided Photos: For an extra touch, you can include photos on both sides of the key fob by cutting and layering accordingly.
Cherish Memories Every Day with Picture Key Fobs
Creating DIY photo key fobs is a rewarding and enjoyable craft. These personalized accessories are a beautiful way to keep your cherished memories close and make heartfelt gifts for any occasion. With the help of your Cricut machine and some creativity, you can transform simple pictures into treasured keepsakes that bring joy every time you reach for your keys. Start crafting your own picture key fobs today and carry your favorite moments with you wherever you go!