Keychains are everyday essentials, and what’s better than one that reflects your personal style or makes a thoughtful, handcrafted gift? With Self Finishing Needlepoint Key Fob kits, you can easily create unique and durable keychains right at home. If you’re searching for a fulfilling, quick craft project or a personalized present for teachers, friends, or family, look no further. These kits provide everything you need to stitch and assemble charming key fobs effortlessly.
Discover our wide selection of self finishing keychain kits now!
Many find the idea of finishing needlepoint projects themselves intimidating, but with our simple, step-by-step tutorial, you’ll master the art of creating professional-looking keychains in minutes. The key technique to learn is the “Binding Stitch,” which provides a clean and robust edge to your needlepoint.
The binding stitch is essential for adding a polished and durable finish to various needlepoint projects, including keychains, belts, and even purse straps. It’s applied as the final step, securing the edges and enhancing longevity. Our detailed tutorial on the binding stitch will guide you through the process. Once you get the rhythm, you’ll find it’s a surprisingly relaxing and meditative technique. If we can do it, you certainly can too!
Follow these straightforward instructions to perfectly finish your own self finishing needlepoint key fob.
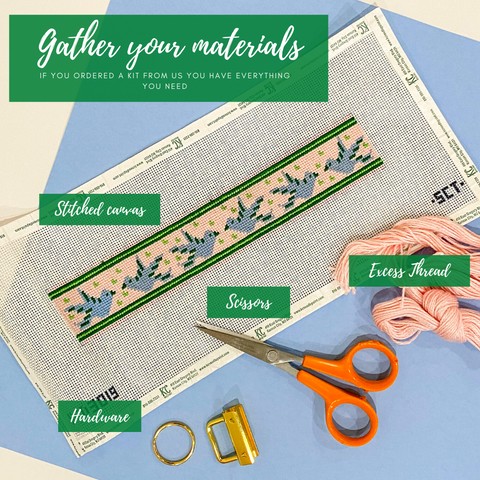
Materials You’ll Need
- Needlepoint Keychain Canvas – Stitched
- Excess thread for binding stitch
- Key Fob Hardware
- Sharp Sewing Scissors
Step 1: Gather Your Supplies
Ensure you have all the necessary materials listed above. If you purchased a self finishing needlepoint key fob kit from KC Needlepoint, your kit includes all these items.
Step 2: Stitch Your Design
When stitching your keychain canvas, it’s crucial to leave the outermost two canvas threads unstitched on each long edge. Stitch your chosen design within these boundaries, leaving these four rows free. This space is reserved for the binding stitch, ensuring a perfect fit with the key fob hardware.
Step 3: Trim the Canvas
With the outer rows unstitched, proceed to trim the excess canvas closely. Cut away most of the extra fabric to make folding easier. On the side you intend to finish first, trim right up to the first unstitched row.
Step 4: Fold the Canvas
Fold your canvas in half, aligning your design on both sides. Count the threads between design elements to ensure the fold is as even as possible. Don’t worry if it’s slightly off by a thread or two; the hardware will conceal any minor discrepancies.
Step 5: Apply the Binding Stitch
Use the binding stitch to securely join both sides of the folded canvas, creating a neat, long strip. Start on the trimmed side, working from the fold towards the open end. Repeat on the opposite side after trimming the excess rows.
Step 6: Attach the Hardware
Once both sides are bound, it’s time to add the key fob hardware. This step is quite straightforward. Slide the hardware onto the open end of the keychain and squeeze it firmly to secure it in place. You can usually do this by hand, but pliers can be helpful for a tighter closure.
Step 7: Add Your Keys and Enjoy!
Your self finishing needlepoint key fob is now complete! Attach it to your keys, backpack, or use it to keep track of spare keys. These also make wonderful, personalized gifts for any occasion.
Order your self finishing keychain kit today and start crafting!
Due to their popularity, our self finishing needlepoint key fob kits are quickly selling out. Order soon to get your preferred designs and colors!